Teacher Guide
This page explains every teacher feature one by one: what it is, how to operate it, its options, who it affects, and what students see. Use the left-hand outline to jump around.
Launch & select a teaching channel
Double-click the cc-class Teacher desktop icon. On first entry you select a teaching channel:
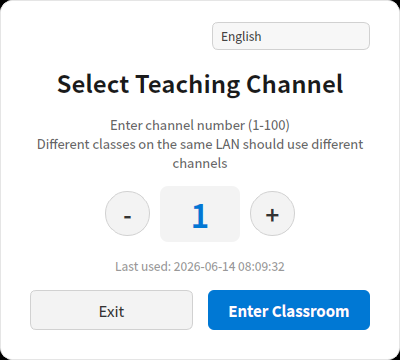
- What a channel is: a "code" that separates classes on the same LAN. A student only connects to a teacher on the same channel.
- How to choose: adjust the number (1–100) with
–/+, then click Enter Classroom. When several classes run at once in one room, give each class a different channel. - Conflict detection: if the channel you pick is already used by another teacher on the same subnet, you'll see "channel already in use" — pick another.
- The top-right corner switches the interface language (Chinese/English/Japanese/Korean…), with identical button positions.
Students can only connect after you "Enter Classroom"
The main window only starts accepting student connections after you enter the classroom. While the channel/trial dialog is open, students cannot connect.
You then reach the main window:
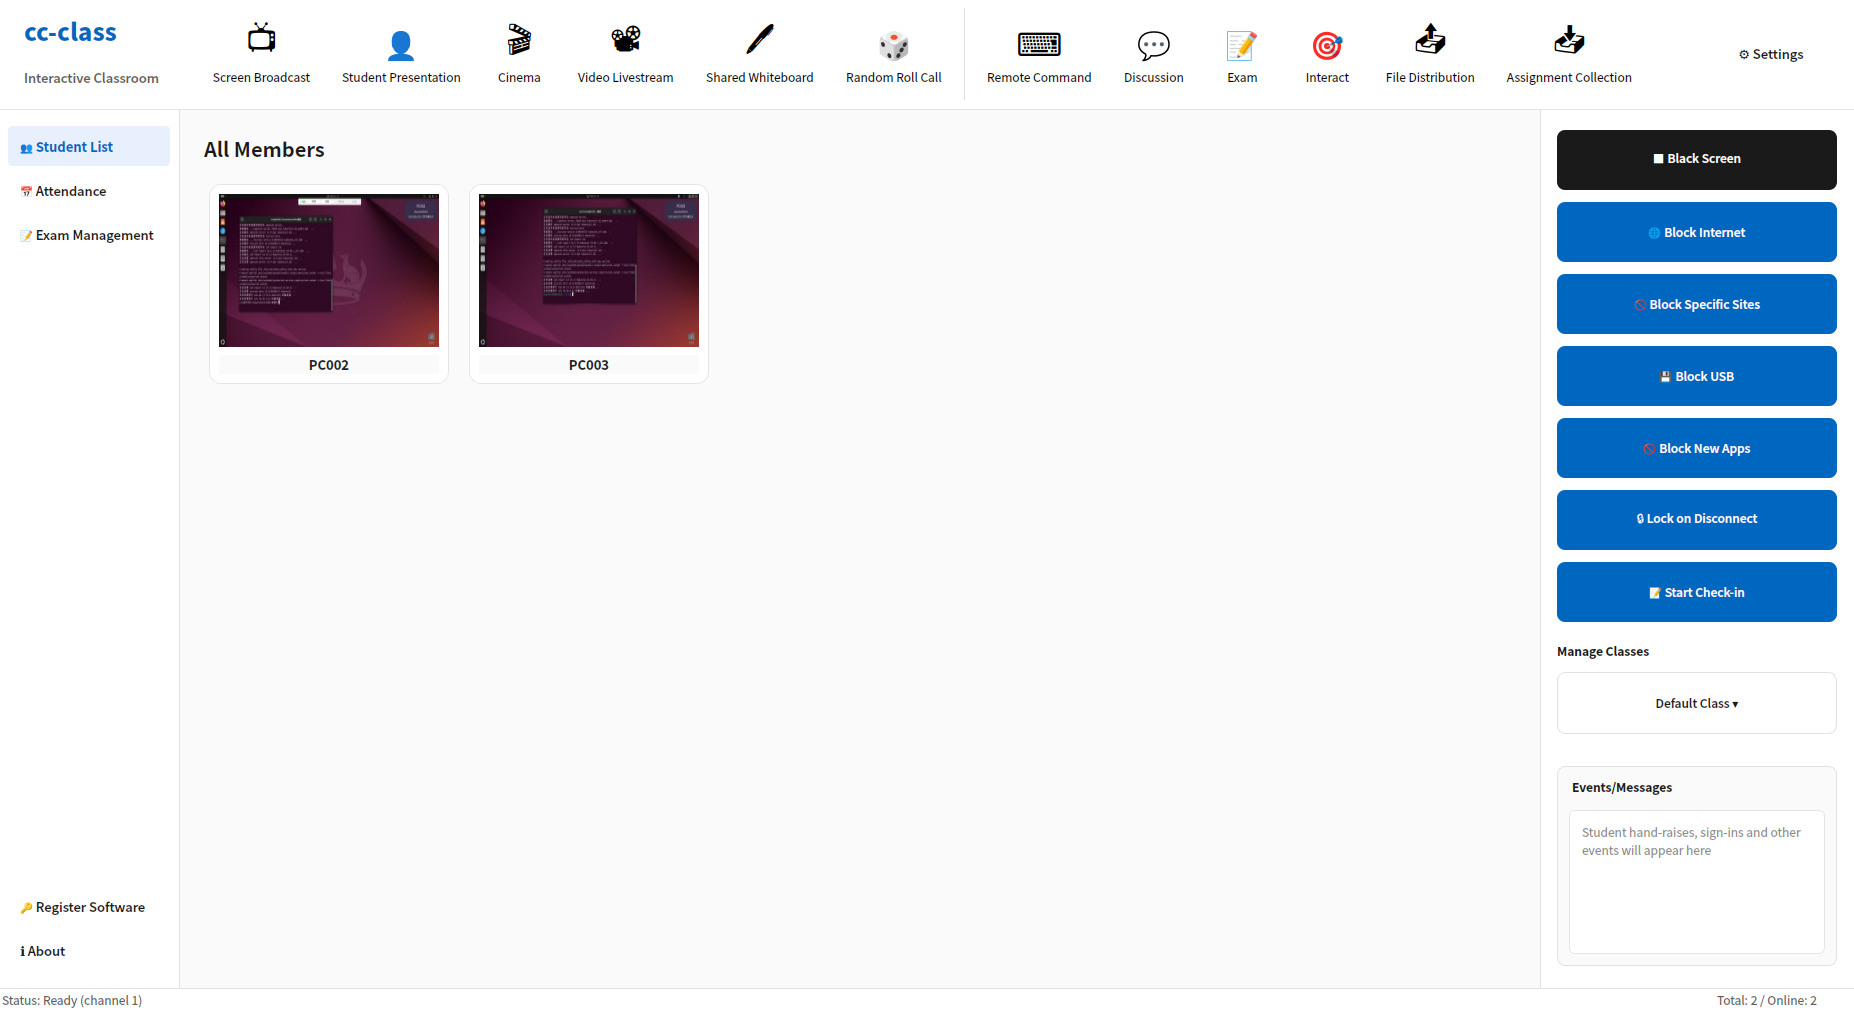
Interface overview
| Area | Location | Purpose |
|---|---|---|
| Top toolbar | top | core features: teaching/presentation, interaction, remote command, exam, files |
| Left navigation | left | Student List / Attendance / Exam Management / Register Software / About |
| Center student area | center | one card per student PC with live thumbnail, machine name, online/hand-raise/presentation status |
| Right control panel | right | black screen, block internet, block USB, lock on disconnect, check-in, manage classes, events |
| Bottom status bar | bottom | current channel, online/total count |
The top toolbar, enlarged (left to right):

How to choose the target:
- All students: most features (broadcast, cinema, block internet, black screen…) apply to all online students by default.
- A single student: click to select or right-click a card for the single-student menu; double-click to remote-control that student directly.
1. Screen broadcast & teaching presentation
This group is for "showing a screen to students". Usually only one runs at a time; starting a new one stops the old.
1.1 Screen Broadcast
Broadcasts the teacher's own screen to all students in real time.
- How: click Screen Broadcast → in the mode dialog choose:
- Full screen: broadcast the whole desktop.
- Window: broadcast one specific window only (students see nothing else — good for demoing a single app).
- Affects: all online students (a student currently being "presented" is excluded automatically).
- Annotate while broadcasting: an annotation toolbar appears — pick pen color/width, eraser, shapes, and draw over the screen to explain.
- Students see: a full-screen window of your screen pops up; while watching, F2 takes a note-screenshot, saved to
Documents/课堂笔记/(Class Notes). - Stop: click the button again (now labelled "Stop Broadcast").
1.2 Student Presentation
Forwards one student's screen to the whole class — for having a student demonstrate.
- How: click Student Presentation → pick the student in the list dialog; or right-click the card → Start presentation.
- Side effects: that student's screen is broadcast to everyone else, and a remote-control window for that student opens for the teacher (you can take over any time).
- Affects: the 1 selected student (their screen → everyone else).
- Stop: click "Stop presentation", or right-click the card → cancel presentation.
1.3 Video Livestream
Streams "screen + camera + audio" to students at once — ideal for narrated, on-camera teaching.
- How: click Video Livestream to toggle on/off. Turning it on also starts voice broadcast and opens the annotation toolbar.
- Affects: all students.
- Students see: a full-screen view of your live feed.
1.4 Cinema
Plays one video file in sync to the whole class (lessons, clips, etc.).
- How: click Cinema → choose a video (
.mp4 / .mkv / .avi / .mov / .wmv) → all students play it together. - Teacher side: a separate player window opens so you can monitor playback.
- Affects: all students.
- Stop: click "Stop playback". Starting cinema automatically stops broadcast/livestream/presentation.
1.5 Shared Whiteboard
Opens a real-time shared canvas — the teacher writes/draws and students see it live, like an electronic blackboard.
- How: click Shared Whiteboard to open; use the annotation toolbar for color, pen width, eraser and shapes.
- Affects: all students.
- Stop: click "Stop whiteboard".
2. Classroom interaction
2.1 Random Roll Call
Picks a random student with a scrolling animation.
- How: click Random Roll Call → a scrolling-animation dialog appears (students see the animation too, for atmosphere) → after ~3 seconds one student is locked in.
- After picking: one click on "Share screen" presents that student's screen to the class (starts their presentation).
- Affects: 1 random student.
2.2 Discussion / chat
A classroom chat room.
- Direct click: opens the "all-class" group chat window.
- Drop-down menu:
- Open chat window: the teacher can send text, emoji, images, files, screenshots.
- Allow / forbid student chat: toggle whether students can post.
- Group discussion management: create/manage discussion groups; switch "group ↔ back to all-class".
- Students see: once allowed, the "Discussion" button on the student toolbar becomes clickable, opening the chat (supports Ctrl+V image paste and drag-and-drop).
2.3 Interact menu
Click Interact for a set of in-class tools:
| Feature | Action / how |
|---|---|
| Quick answer | a buzz-in button appears on students; whoever presses first is shown to the teacher |
| Polling | create single/multiple-choice polls; students answer; see live tallies |
| Peer assessment | have students rate one another |
| Push slides | choose courseware (ppt/pptx/pdf/doc/docx/images/mp4/avi) and push it to all students, opening automatically |
| Courseware library | manage a reusable courseware repository |
| Lesson objectives / outline | set the lesson title, goals and outline visible to students |
| Reward leaderboard | show student point rankings |
| Class report | statistics: hand-raises, quick answers, votes, chat, etc. |
| Send danmaku | type text and broadcast scrolling overlay text to the class |
| Browser keyword block | set keywords; student browsers hitting one are blocked/warned |
| AI assistant | auto-generate questions, grade subjective answers |
| Desktop recording | start/stop recording the teacher's screen to a file |
| Bind window broadcast | broadcast one specific window only |
| USB control | four modes: Open / Read-only / No-execute / Block |
| App/URL monitor | toggle; monitor the programs students run and sites they visit |
| Print control | allow / forbid student printing |
| Allow note screenshot / allow student help | toggles |
Most interaction features affect all students; push-slides and danmaku are pushed instantly.
3. Remote Command
A menu of system-level remote actions, applied to all students.
| Item | Action / how | Students see |
|---|---|---|
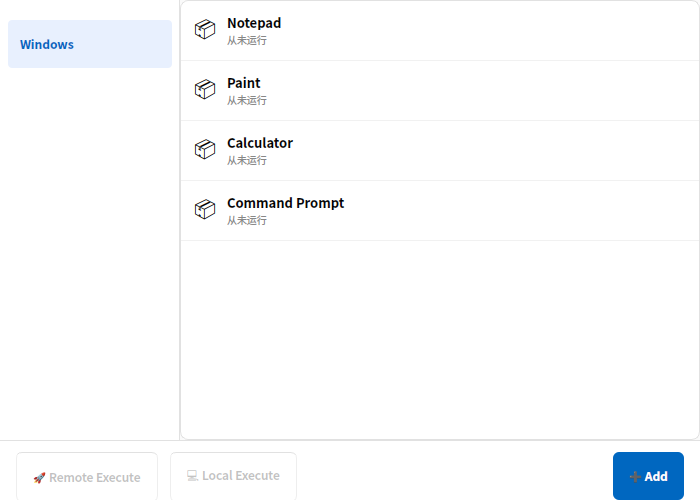
| Launch application | start a program on student PCs: pick from a preset list (Notepad/Paint/Calculator/Command Prompt…) and Remote Execute, or Add a custom program path + arguments | the program opens on student PCs |
| Open website | enter a URL to open in the student browser | the page pops up on student PCs |
| Manage applications | view and kill running processes on student PCs | the process is closed |
| Wake-on-LAN | send a magic packet to offline machines (needs WoL support on the NIC/board) | offline machines power on |
| Shutdown | power off all students (with confirmation) | student PCs shut down |
| Reboot | restart all students (with confirmation) | student PCs reboot |
| Close specific process | enter a process name to bulk-kill (e.g. chrome.exe) | the process is force-closed |
| Close all desktop apps | close all desktop programs on students at once | all student desktop apps close |
| Cloud desktop maintenance | submenu: client network / local-info settings | — |
Shutdown/Reboot/Close are irreversible
These act directly on every student machine. Confirm before running (the menu prompts for confirmation).
4. Exam
Distribute a paper for online answering, with timing, auto-collection and statistics.
- Import paper: menu Import paper (CSV) → choose a CSV question bank filled in per the template. Question types: single choice, multiple choice, true/false, fill-in, short answer.
- Start exam: menu Start exam → the paper is distributed to all students and the timer starts.
- Stop exam: menu Stop exam → stop, collect, and grade.
- Exam Management panel (left "Exam Management" tab): shows each student's progress (answered/total) and score live; can export to Excel, download the CSV template, and set the exam duration.
- Students see: a full-screen exam window with subject/class and a countdown at the top; it auto-submits when time runs out and closes.
5. File distribution & assignment collection
5.1 File Distribution
Push files to all students at once.
- How: click File Distribution → add files (drag-and-drop supported) → choose the target path on student PCs (Desktop / C: / D: / E: / a custom path) → optionally auto-run after delivery with arguments → push.
- Progress: the dialog shows each student's receive progress.
- Affects: all students.
5.2 Assignment Collection
Collect students' work files.
- How: click Assignment Collection → start a collection task (name it) → the "Submit Assignment" button on students becomes active.
- Collecting: you see each student's submission status live and can download their screenshots + files; a screen snapshot preview is also available while collecting.
- Affects: all students.
- Students see: after clicking "Submit Assignment", they can capture a screenshot or upload images and drag in assignment files, and submit them together.
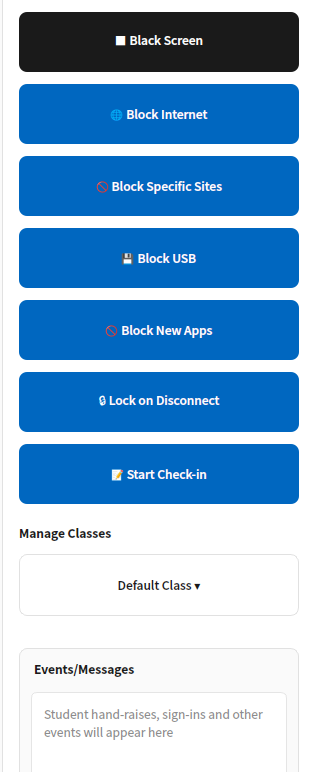
6. Access controls (right panel, all students)
The right-hand column enforces classroom discipline; most are toggles: click once to enable, again to release; red means a control is active.
| Button | Action | Students see / how to release |
|---|---|---|
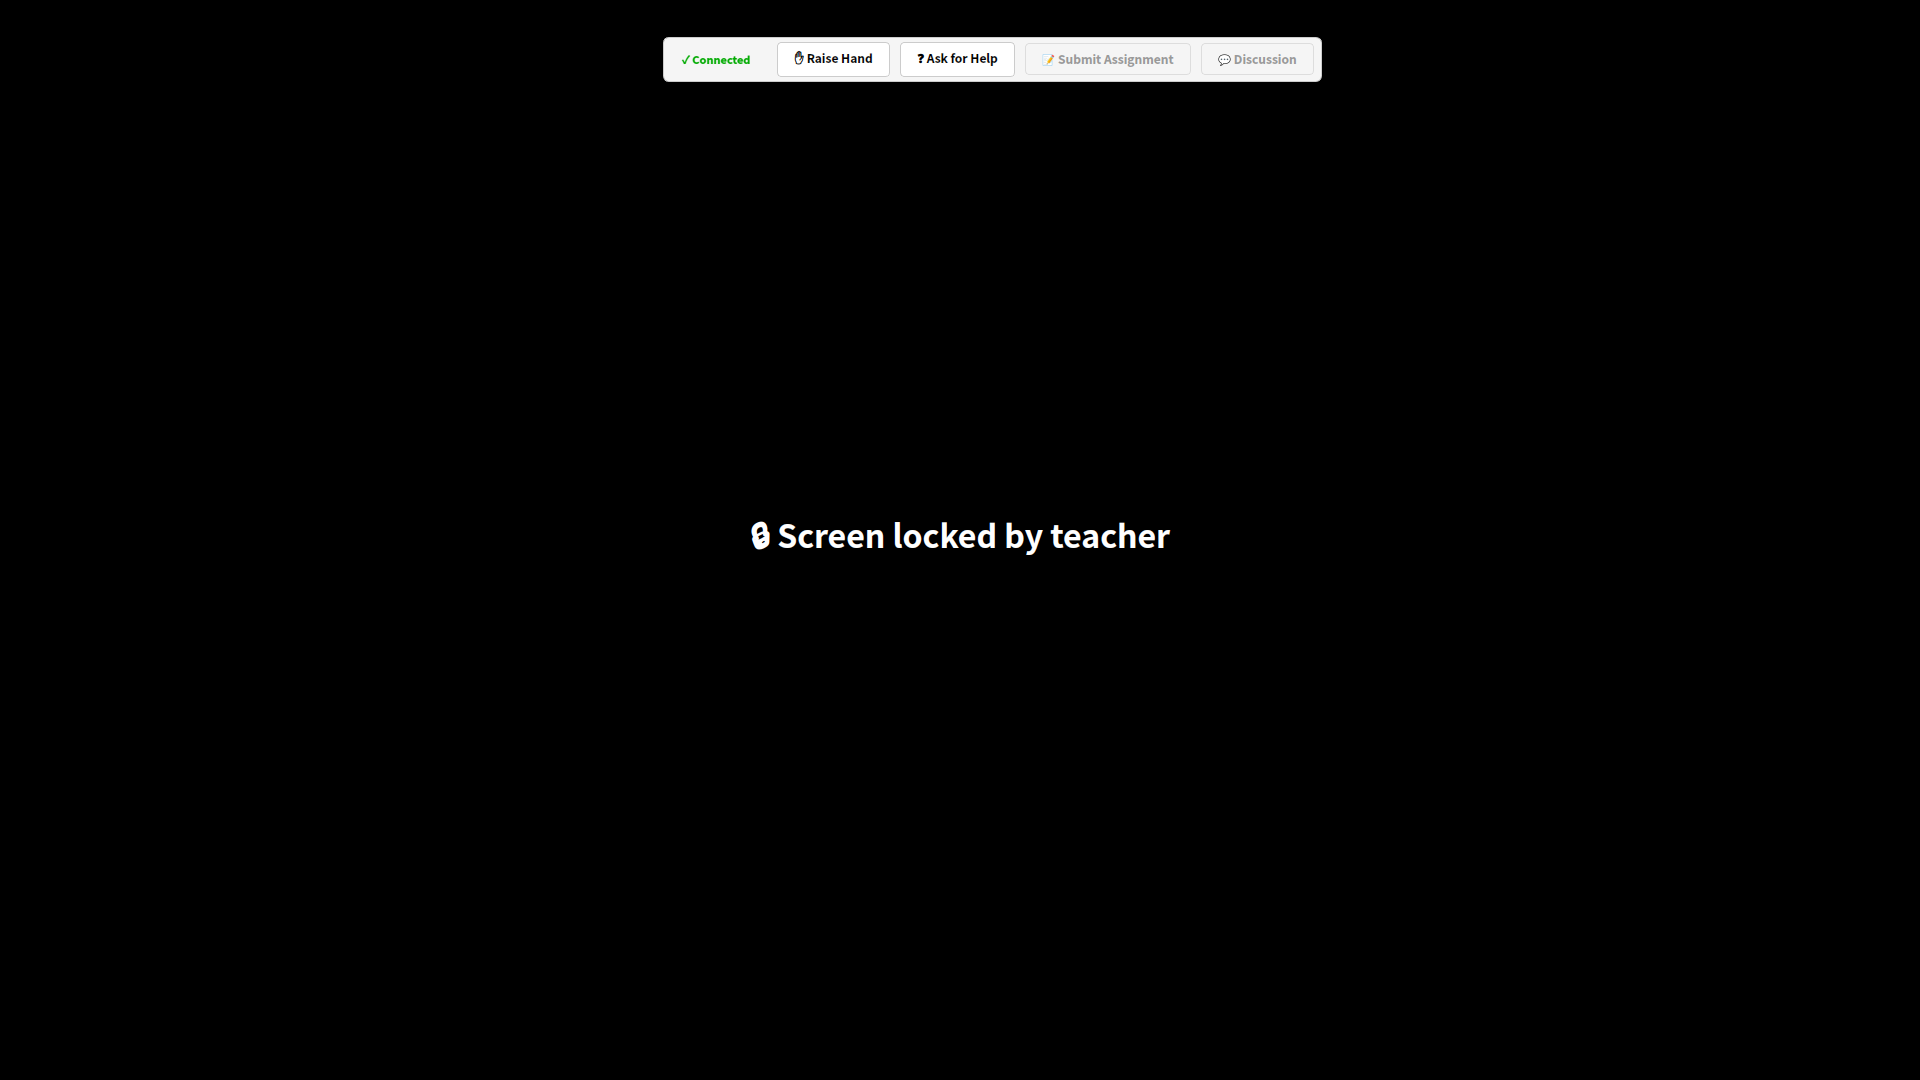
| Black Screen | black out all student screens to force attention | full-screen black with "Screen locked by teacher"; keyboard/mouse taken over; click "Cancel black screen" to release |
| Block Internet | cut off external internet | students can't reach the internet; "Restore internet" reverts |
| Block Specific Sites | restrict sites by blacklist/whitelist | maintain domains and pick black/white mode in the dialog |
| Block USB | disable USB storage | inserted USB drives are unusable; "Allow USB" reverts (finer four modes are under Interact → USB control) |
| Block New Apps | lock students to apps already open — no launching new ones | launching a new program is blocked |
| Lock on Disconnect | once on, a student who loses the connection auto-locks, so they can't escape control by "unplugging/quitting" | dropping out locks (black) immediately, unlocking on reconnect; the top shows how many are "disconnected & locked" |
What a locked student screen looks like:
7. Check-in (attendance)
Record who attended.
How: click Start Check-in on the right → enter the class name for this session:
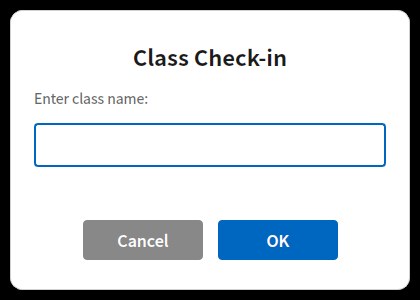
Students: a full-screen sign-in dialog asks for name, class and student ID; submitting completes it (remembered and resubmitted automatically on reconnect).
View roster: the left Attendance tab shows the live list — time, ID, name, machine, MAC, IP.
Export & history: one-click export to Excel; save/review past check-in sessions.
Stop: click "Stop Check-in" again.
8. Monitoring & per-student actions
8.1 Live monitoring
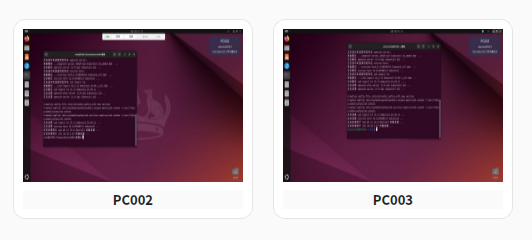
Each card in the center shows a live thumbnail of that student's screen, marked online/hand-raise/presentation — the whole class at a glance.
8.2 Remote Control
Double-click a student card to open the remote-control window and take over that student's mouse and keyboard.
8.3 Student card right-click menu (single student)
Right-click any card to act on that one student:
| Item | Action |
|---|---|
| Remote control | take over their mouse/keyboard |
| One-to-one chat | private chat with that student |
| Capture current screen | save that student's current screen to Documents/课堂快照/ (Class Snapshots) |
| Set / unset group leader | designate/cancel this student as group leader |
| Class evaluation | points: 6 positive (e.g. "active answer +1", up to +3), 4 negative (e.g. "distracted −1"), and custom evaluation (use +N/−N) |
| Block / restore internet | cut/restore internet for this student only |
| Start / stop presentation | present this student's screen to the class / stop |
| Clear hand-raise | clear this student's raised-hand state (shown only when raised) |
9. Manage Classes
The right-panel Manage Classes creates/switches class names and groups students by class for per-class check-in and statistics; your choice is remembered.
10. Settings & Register Software
10.1 Settings
The Settings drop-down (top-right of the toolbar):
- Load / save computer list: export/import the current student list as JSON, to quickly restore a fixed lab.
- System parameters: tune broadcast resolution, frame rate and bitrate to balance clarity vs. smoothness for your network.
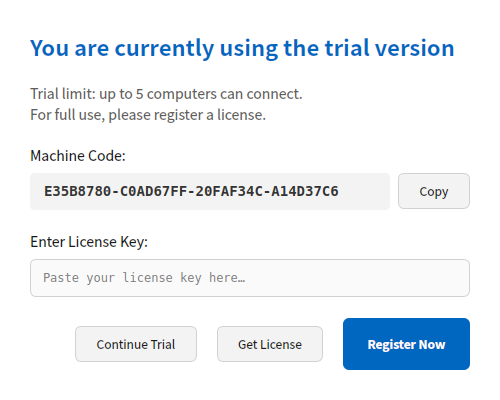
10.2 Register Software
Bottom-left Register Software: you can start the trial via self-service QR-code registration — renewable three times, with unlimited credits (no cap on the number of connected machines). For a long-term, formal license, send the on-screen machine code to your vendor for a license key and enter it.
Next 👉 Student Guide | FAQ