Manual Schedule Entry
1 Go to Console -> Schedule -> Detailed Schedule
Go to Schedule -> Detailed Schedule, select the group, classroom, and term, and the weekly schedule grid for that classroom is displayed. You can manually add a class on any empty time-slot cell.
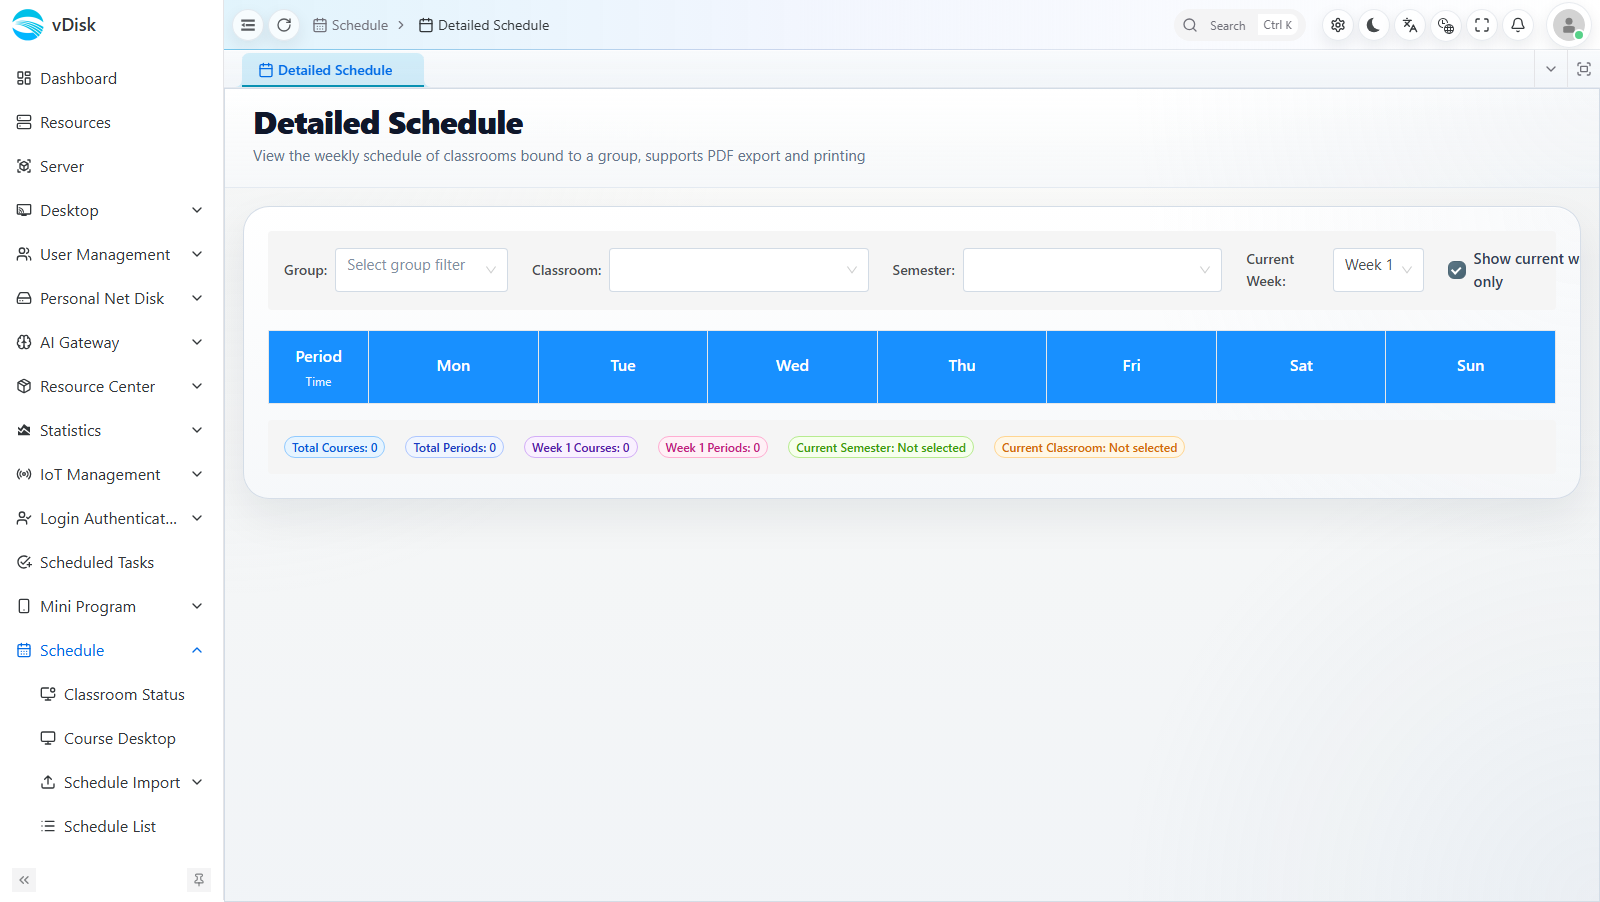
2 Fill in the course information
After triggering the add action on an empty area, you enter the Edit Schedule form; fill in the course information and click Save:
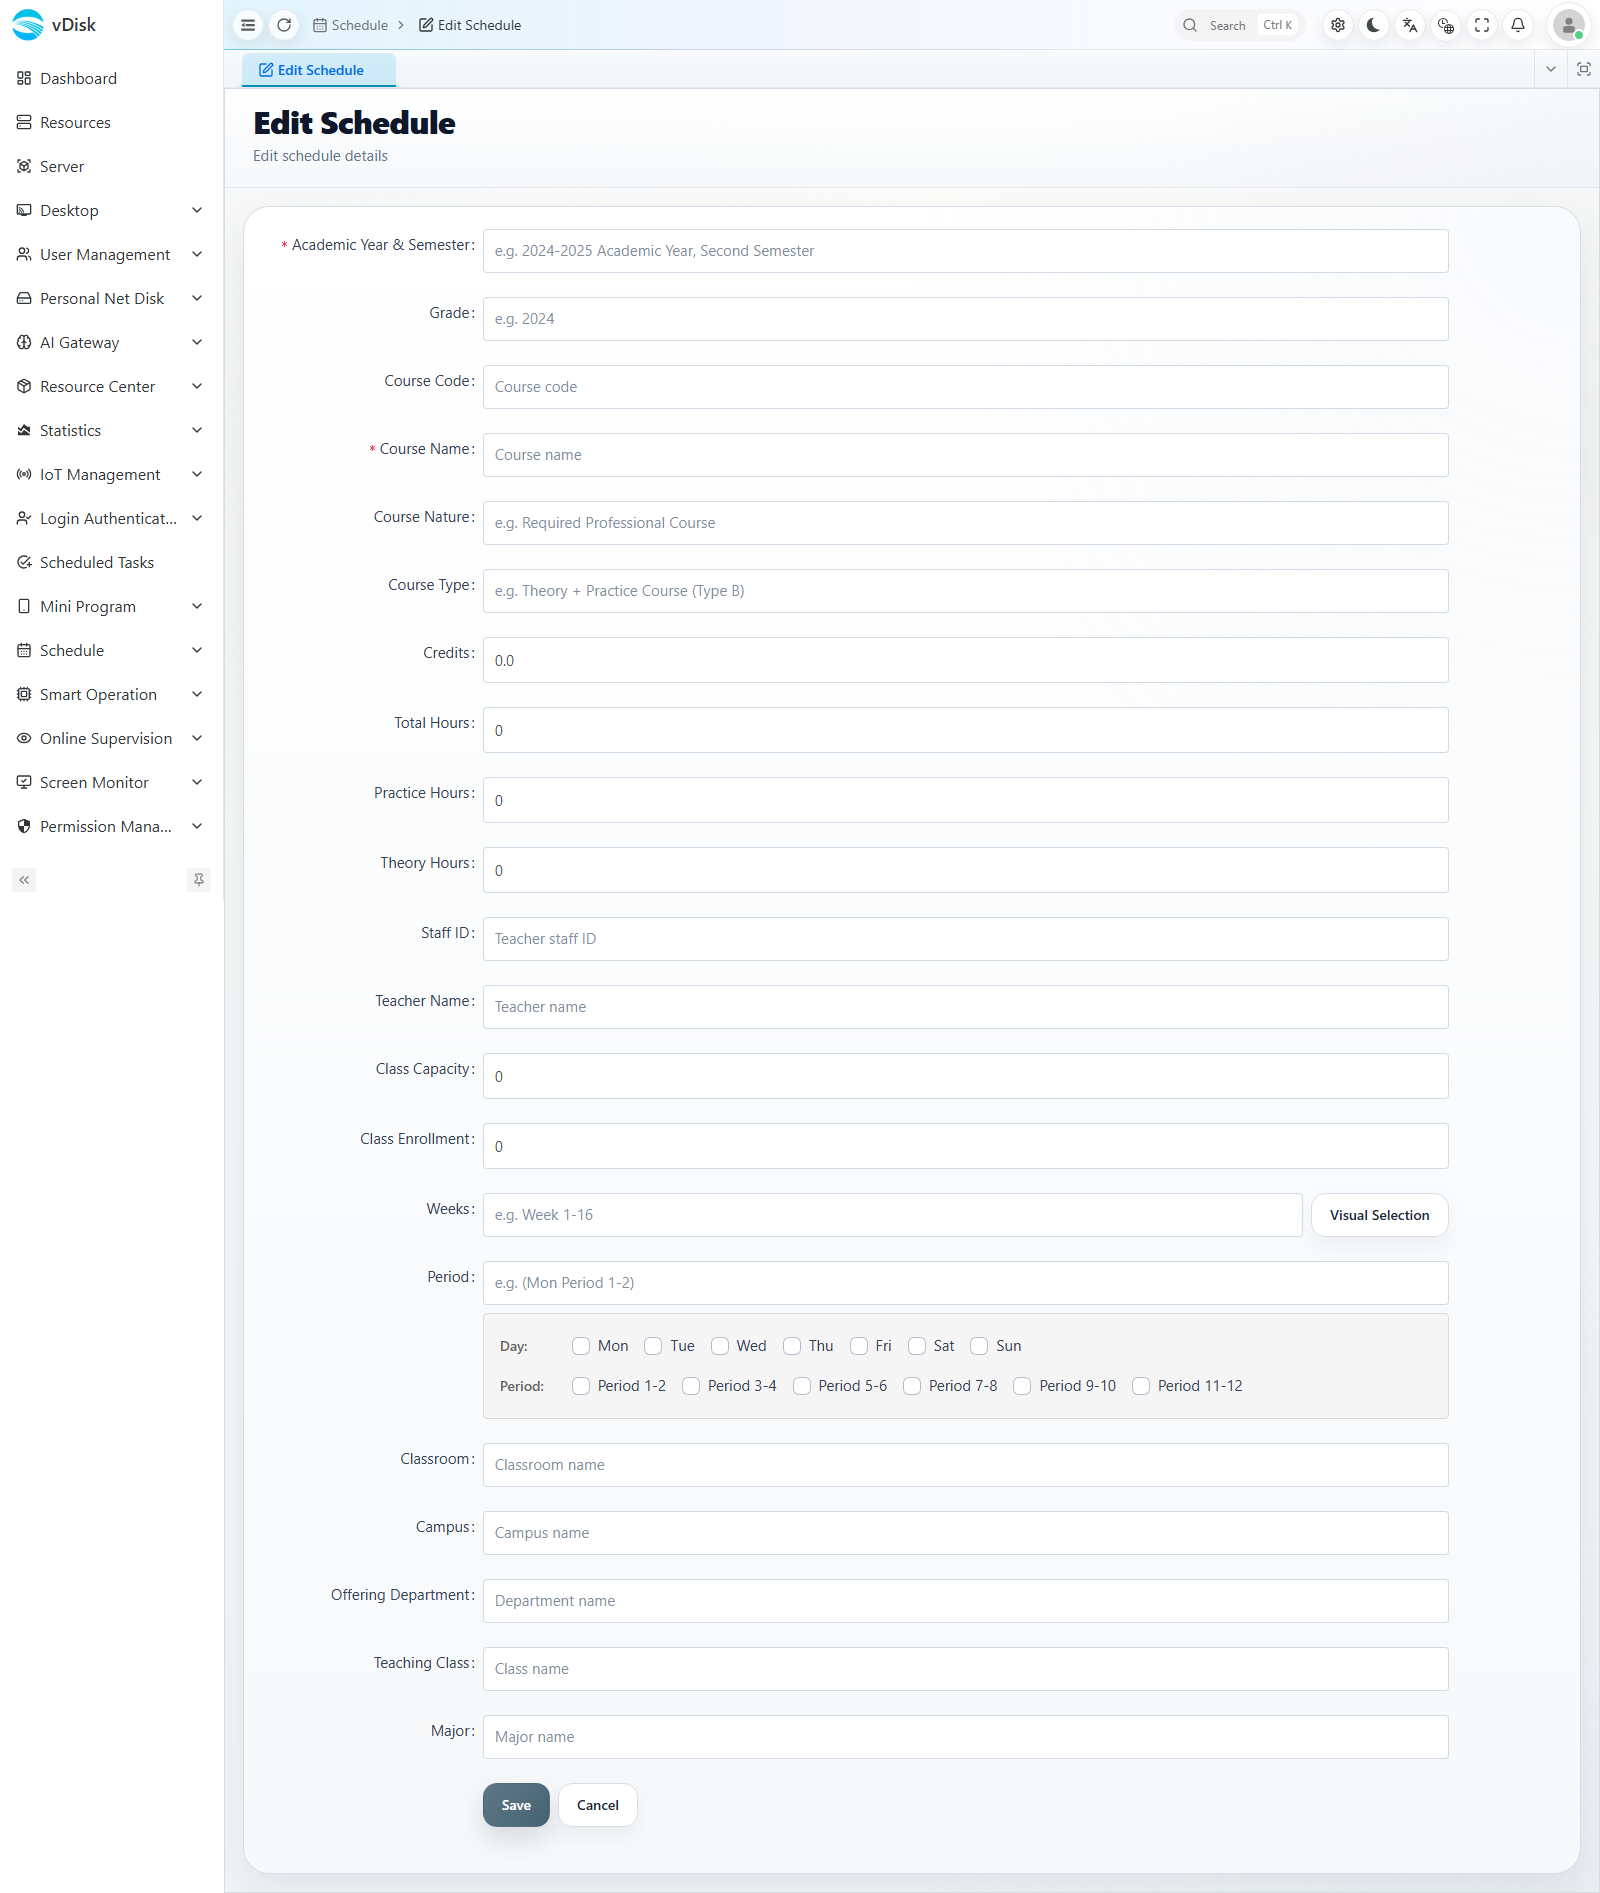
Main form fields:
| Field | Description |
|---|---|
| Academic year/term / Grade | The term and grade the course belongs to |
| Course code / Course name | The course identifier and name |
| Course nature / Type | Course attributes such as required, elective, etc. |
| Teacher ID / Teacher name | Information about the teaching instructor |
| Weeks | The class weeks; you can click Visual Selection to check the weeks |
| Period | The day of week and period of the class |
| Classroom / Campus / Offering department / Teaching class | Other scheduling information |
You can manually insert a class into the gaps of an already-imported schedule.
Modifying the original schedule imported from the academic affairs system is not supported; you can only insert new classes in empty time slots.
Deletion is also limited to manually added classes; original (imported) classes cannot be deleted.