Add / Remove (Mount) Desktops
Mounting (adding) and unmounting (removing) desktops can be done from two places: the Desktop pool (batch operations per group, recommended) and Desktop management (per individual computer). When deploying to many machines, manage everything from the Desktop pool.
1. Desktop pool: mount per group (recommended)
Go to Console → Desktop → Desktop pool. The left panel is the "Virtual Disk List"; the right panel is "Desktop Template".
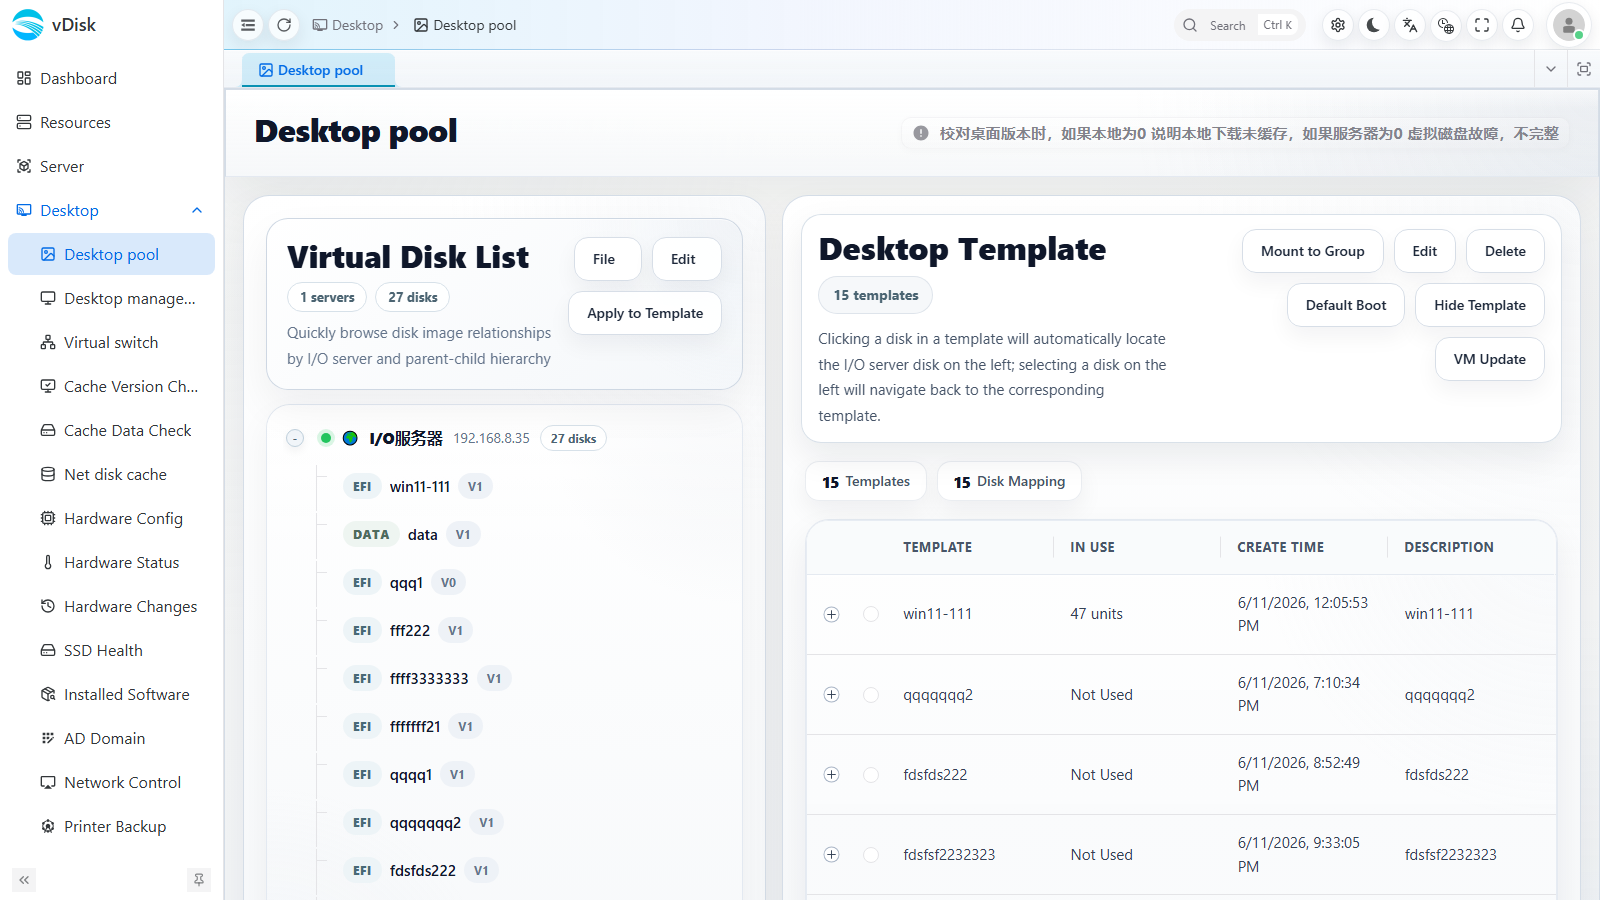
Select a template in the right-hand "Desktop Template" list, then use the toolbar buttons:
| Button | Purpose |
|---|---|
| Apply to Template | Combine the selected virtual disks into a desktop template |
| Mount to Group | Mount the selected template to one or more groups, adding/removing the desktop for every computer in the group |
| Default Boot | Set the selected template as the default desktop the group boots into |
| Hide Template | Hide this desktop in the client boot menu |
| Delete | Delete the index of this desktop template |
2. Desktop management: mount per computer
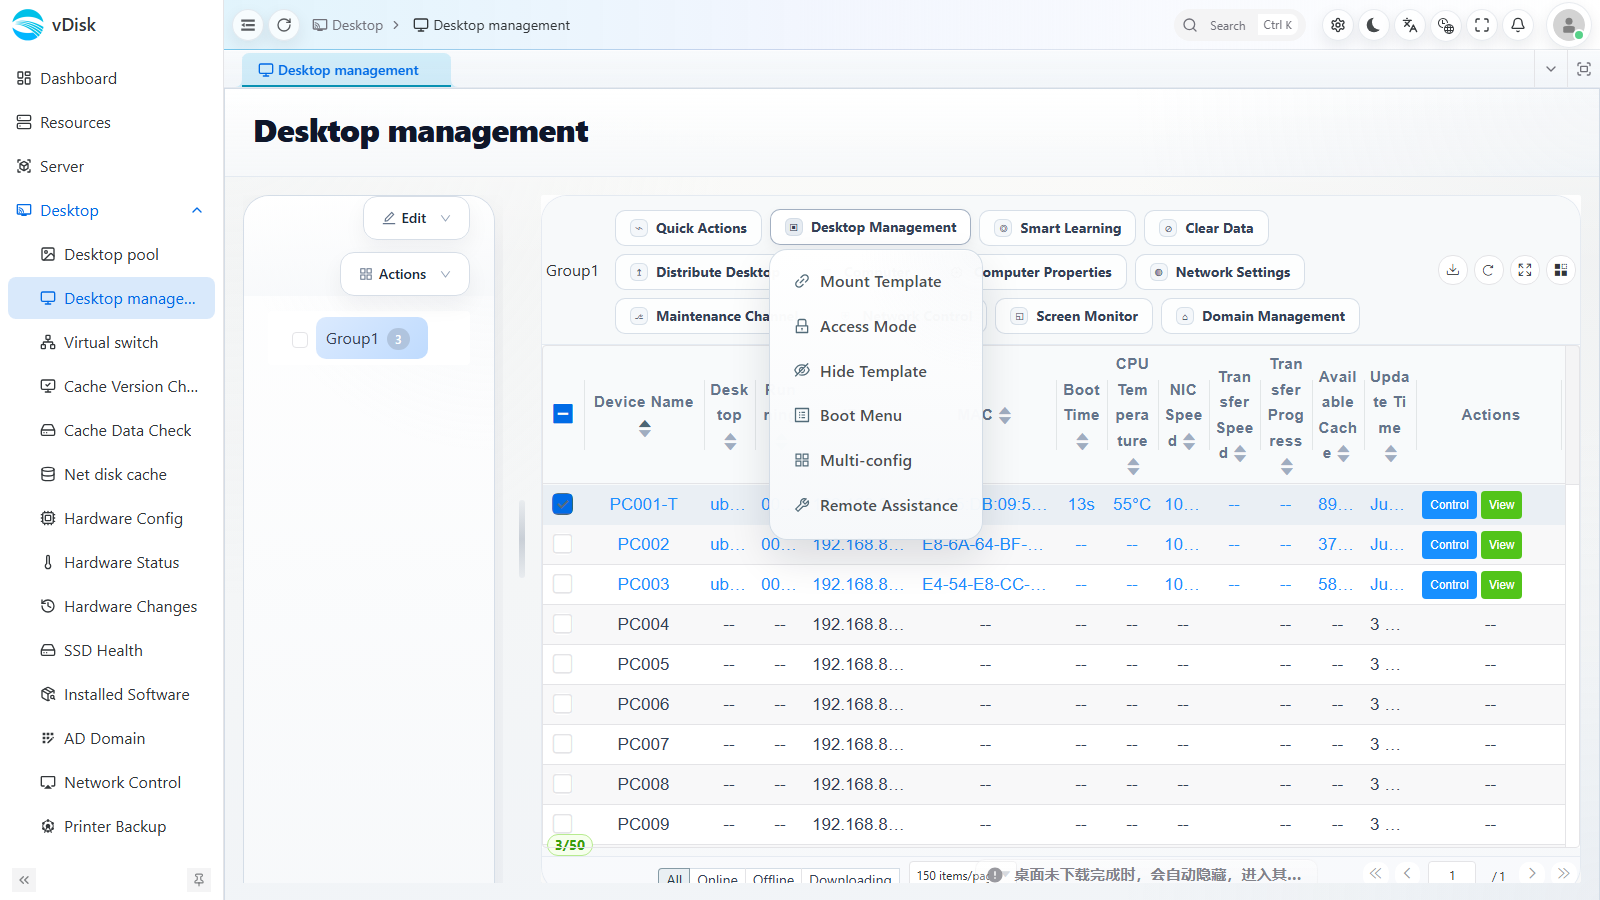
Go to Console → Desktop → Desktop management, select the target computer in the list, then click Desktop Management → Mount Template on the toolbar.
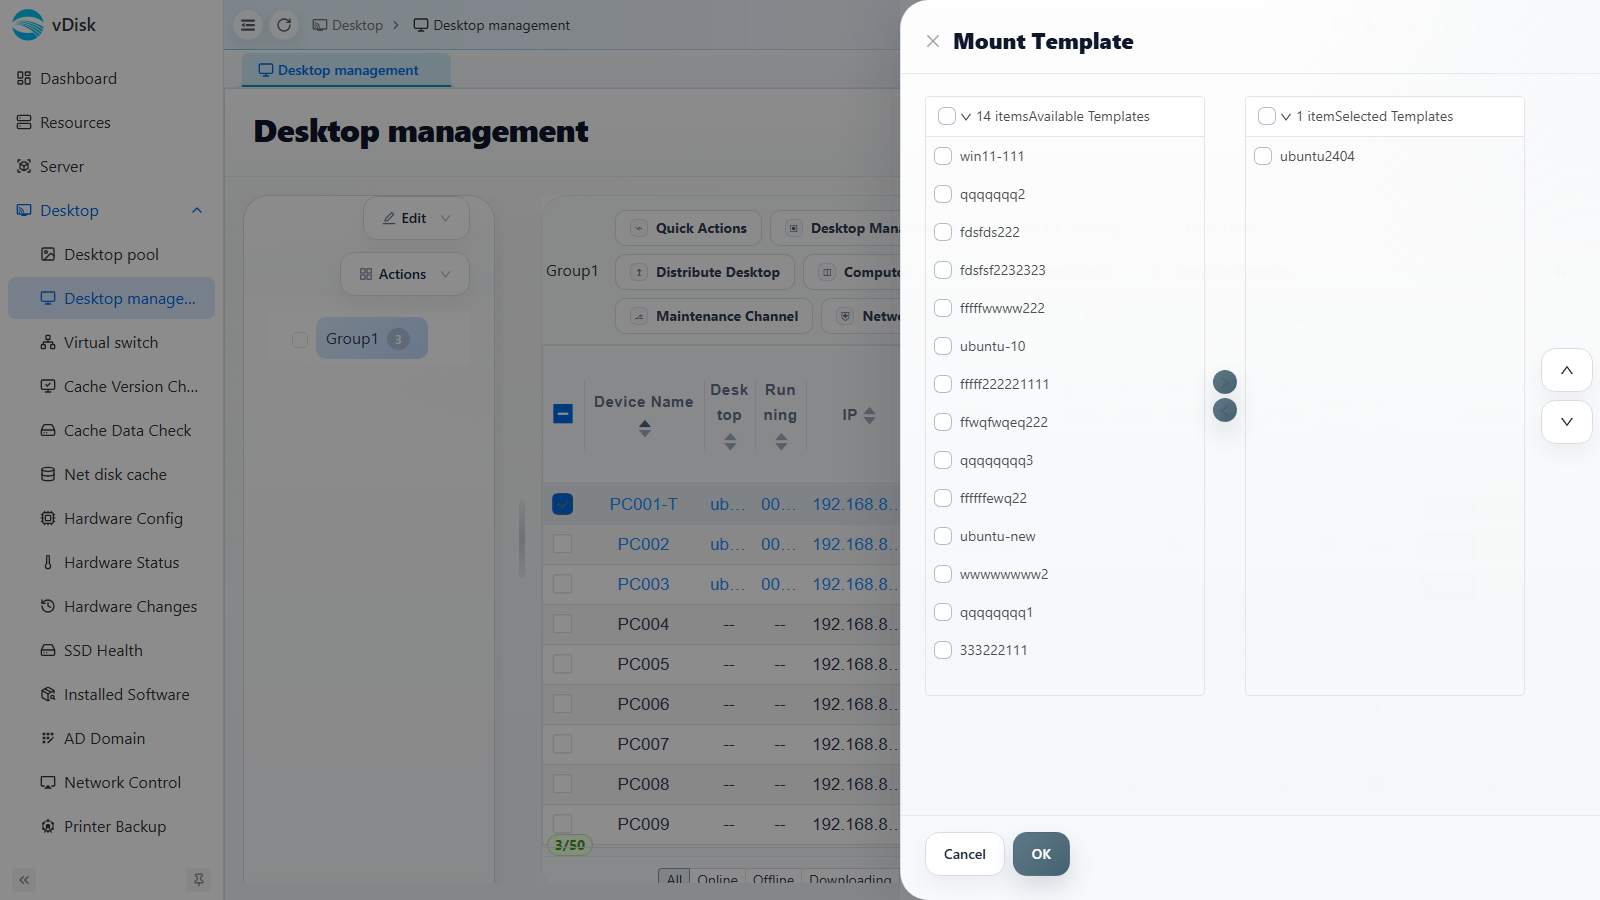
In the "Mount Template" dialog, pick the desktops to deploy from "Available Templates" on the left, move them to "Selected Templates" on the right, then confirm.
3. Notes
Mounting / unmounting adds or removes desktops on the computer.
After adding a desktop, you must also distribute it (Desktop management → Distribute Desktop) to push it to the clients.
Removing a desktop only deletes the index; the data stays on the local disk. To fully remove it, use Desktop management → Clear Data → Clear Cache → Validate Cache.