1. Environment Requirements
Server
| Number of Terminals | Number of Servers | Number of Ports | Capacity | Load Type | Remarks |
|---|---|---|---|---|---|
| 200-800 | 1 | 2 | 4T | Single-machine load | Dual-NIC load balancing optional |
| 800-2000 | 2 | 2 | 4T+ | Dual-machine load | Dual-server load balancing recommended |
| 2000+ | 2+ | 2 | 4T+ | Multi-machine load | Multi-server load balancing recommended |
Client
| Terminal Type | CPU | Memory | Disk | Remarks |
|---|---|---|---|---|
| X86/X64 | 2G+ | 1G+ | 32G+ | When terminal memory is below 1G, the software may not run properly |
| Domestic chips (Loongson / Phytium / Kunpeng, etc.) | —— | 2G+ | 32G+ | Compatible with common domestic-chip machines on the market; see Build Image Linux/Domestic |
2. Software Environment
Server-side Software Environment Requirements
| Item | Requirement | Remarks |
|---|---|---|
| Server OS | Windows Server 2008R2 and above / Linux server | None |
| Console browser | Google Chrome 109 and above (or same-kernel Edge) | The console is the new Web management end |
Terminal Software Environment Requirements
| System Name | Support | Remarks |
|---|---|---|
| windows 98/ME | ✗ | Not supported |
| windows 2000 | ✗ | Not supported |
| windows XP/2003-X86/X64 | ✗ | Not supported |
| windows Vista/Server 2008 | ✗ | No longer supported |
| windows 7/Server 2008R2 | √ | None |
| windows 8/8.1 / Server 2012(R2) | √ | None |
| windows 10/11+ | √ | None |
| Ubuntu / Debian / Fedora / OpenSUSE | √ | None |
| CentOS / RedHat | √ | None |
| NeoKylin / Kylin / UnionTech UOS and other domestic systems | √ | See Build Image Linux/Domestic |
| Other Linux | √ | None |
2. Server-side Installation
1) Install the server
| Type | Installation Method | Remarks |
|---|---|---|
| Windows server | Install with defaults directly, no special configuration needed | None |
| Linux server | Copy the installation file to the server's /switch directory, run chmod 777 /switch then install.sh; requires an Internet connection | None |
3. Initialize the Server
1) Open the console
Open a browser and enter to open the console and initialize the server.
The console is multilingual by default; you can switch between Chinese / English and other languages in the top-right corner.
2) Initialization wizard
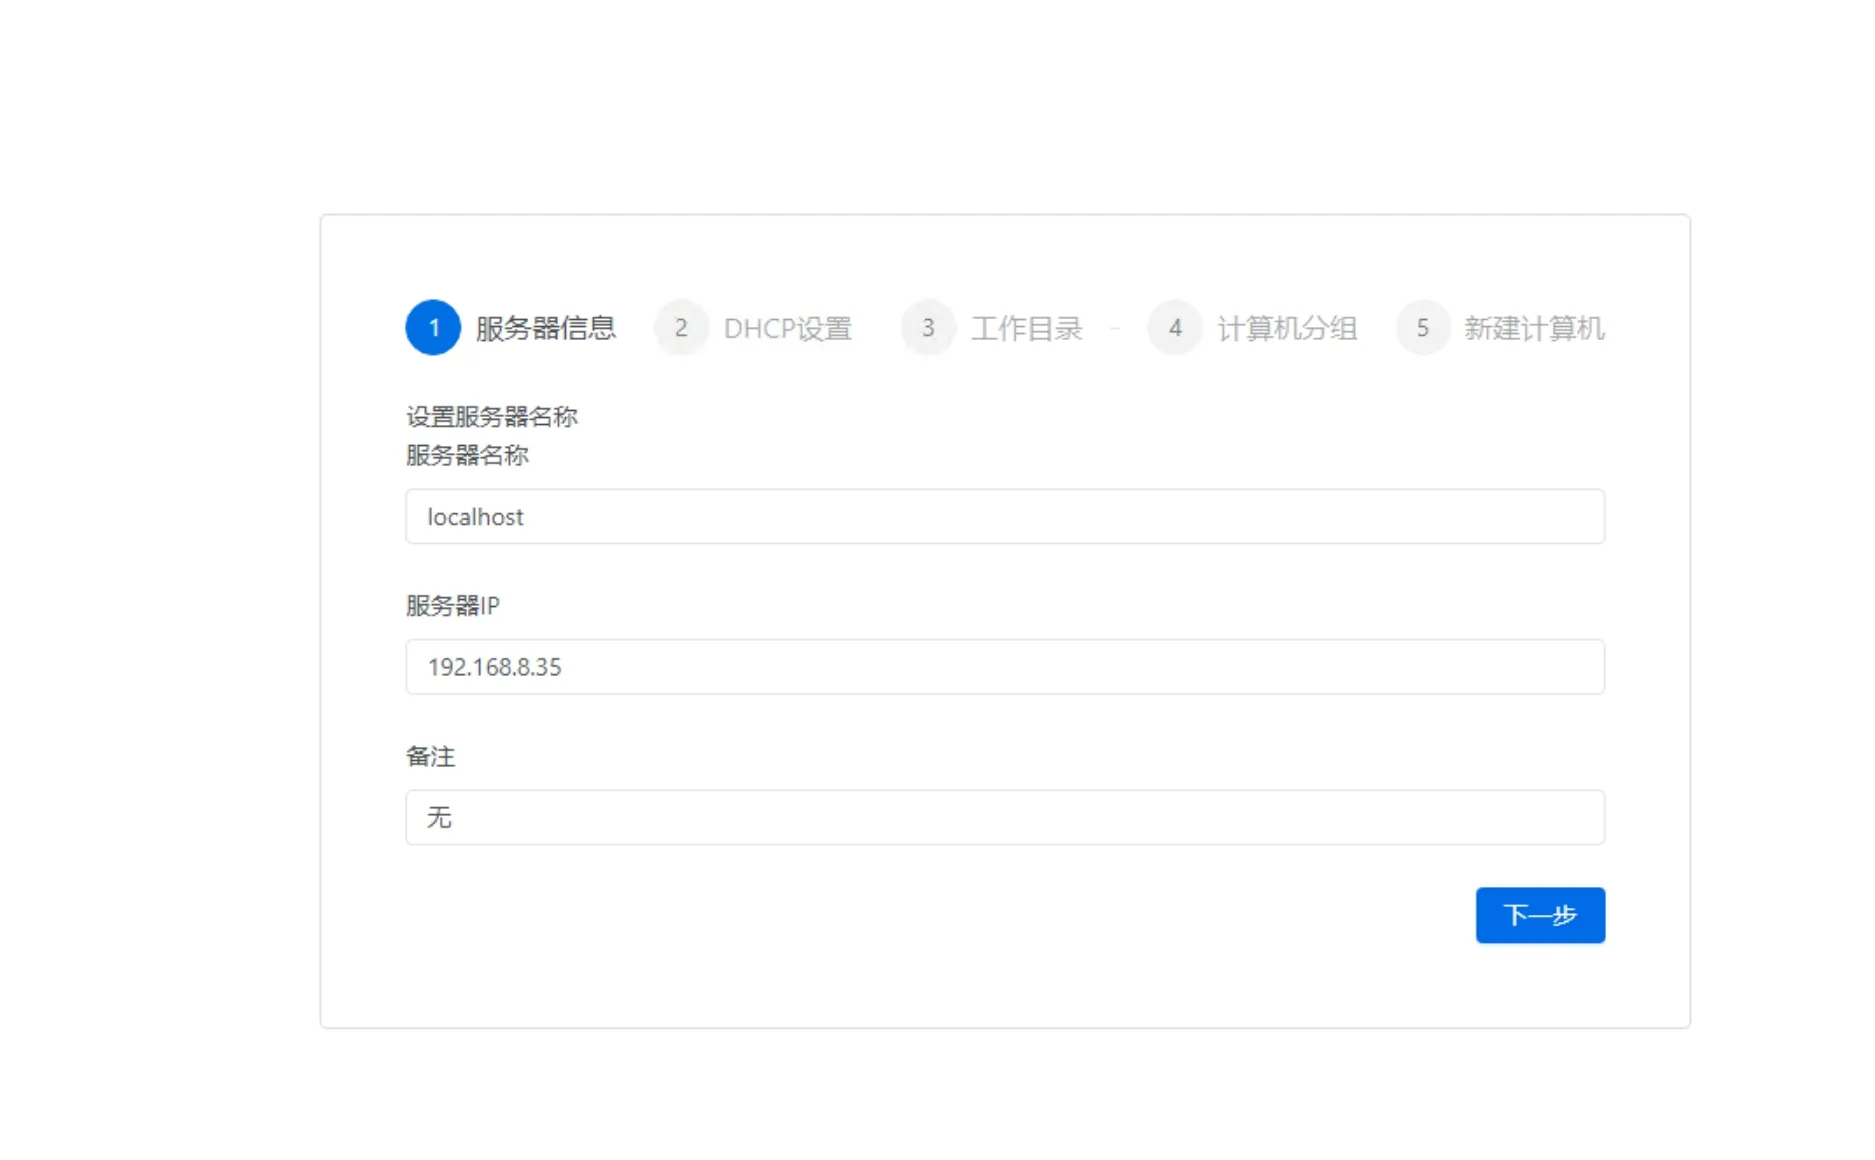
- Server name: used to identify the server; in a multi-server environment, give it an easy-to-remember name
- Server IP: the automatically detected server IP. Please first confirm the server has a static IP set and that it matches the server's actual configuration; if detected incorrectly, you can edit it manually
- Remarks: remark information
3) Service DHCP information
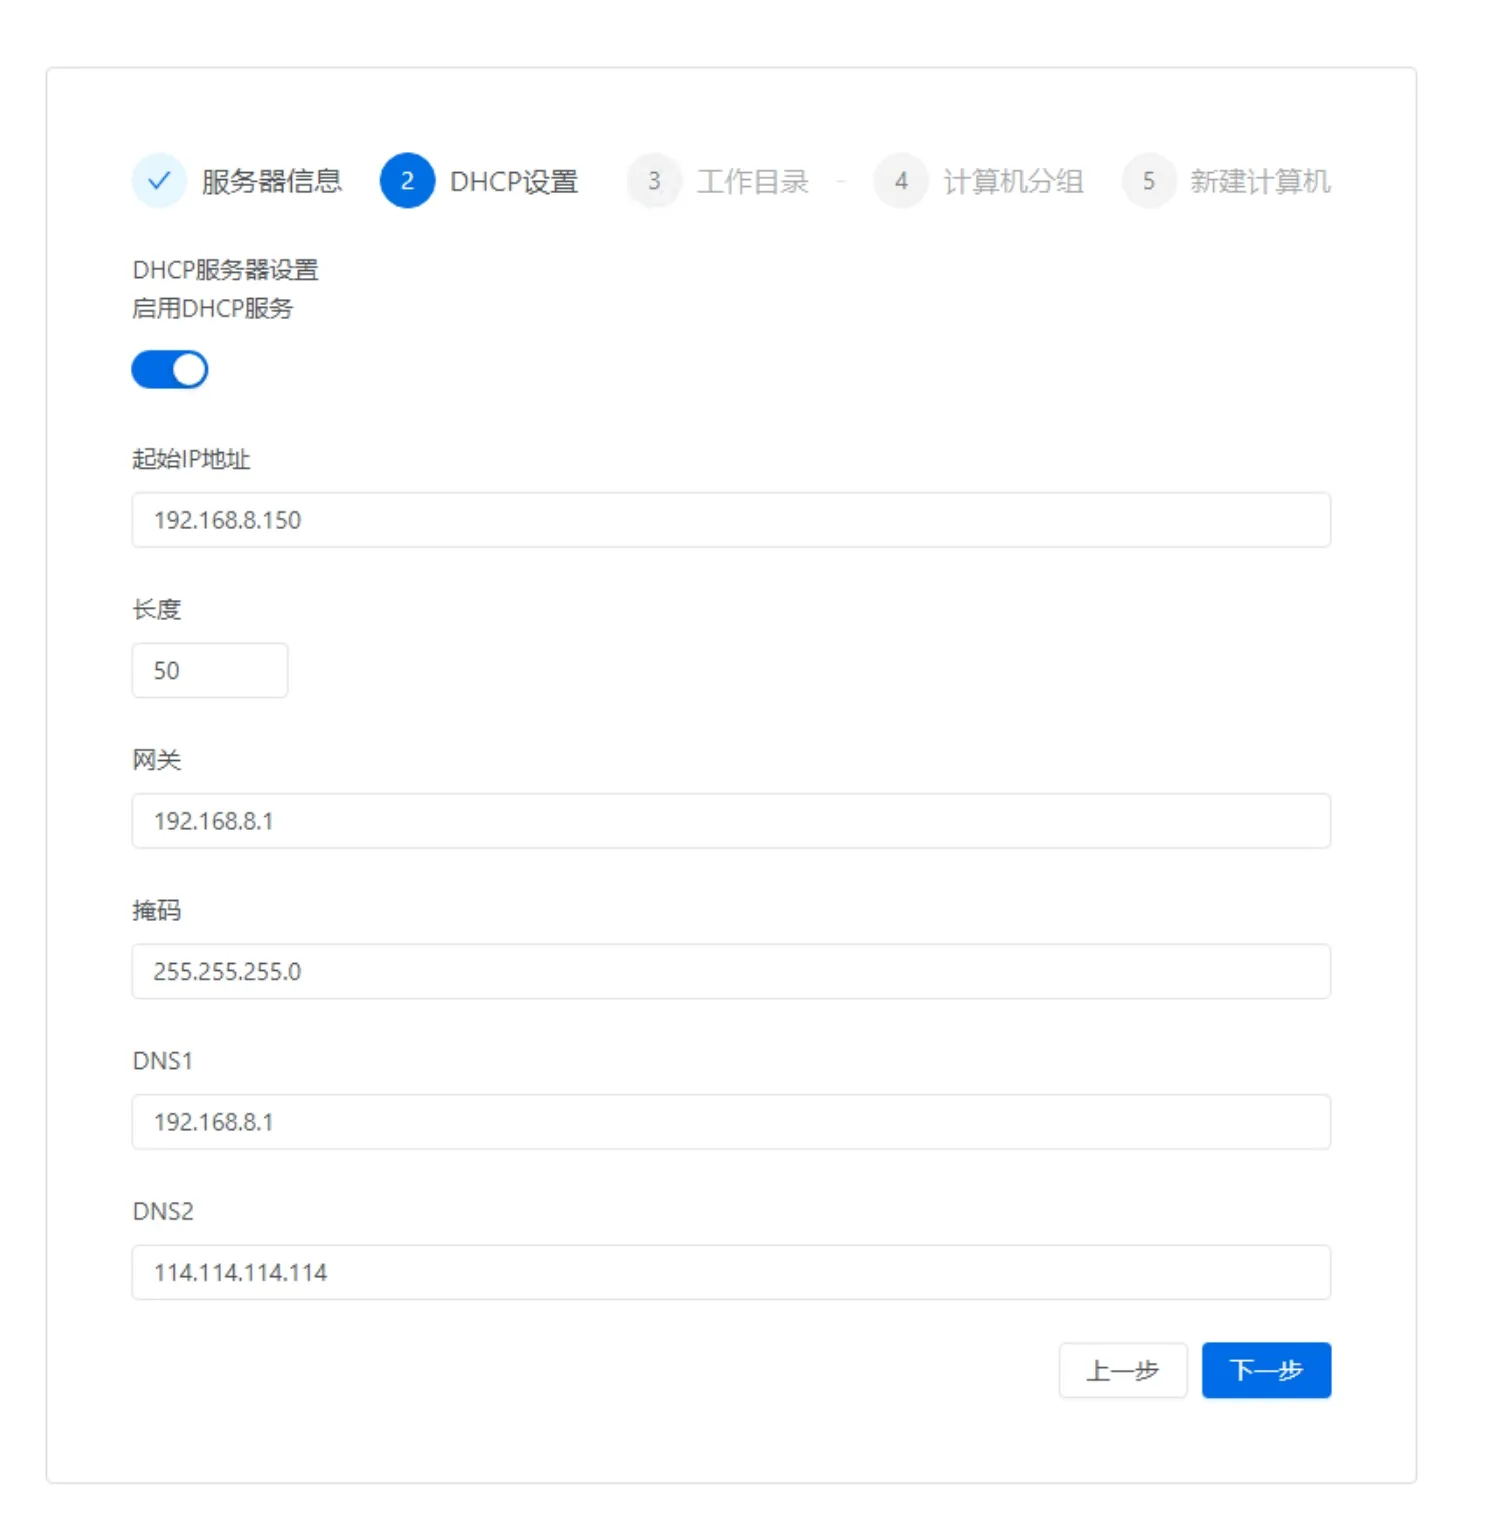
This setting is meaningful when the server and clients are on the same LAN; it is meaningless when they are not on the same LAN — just turn it off.
4) Set the working directory
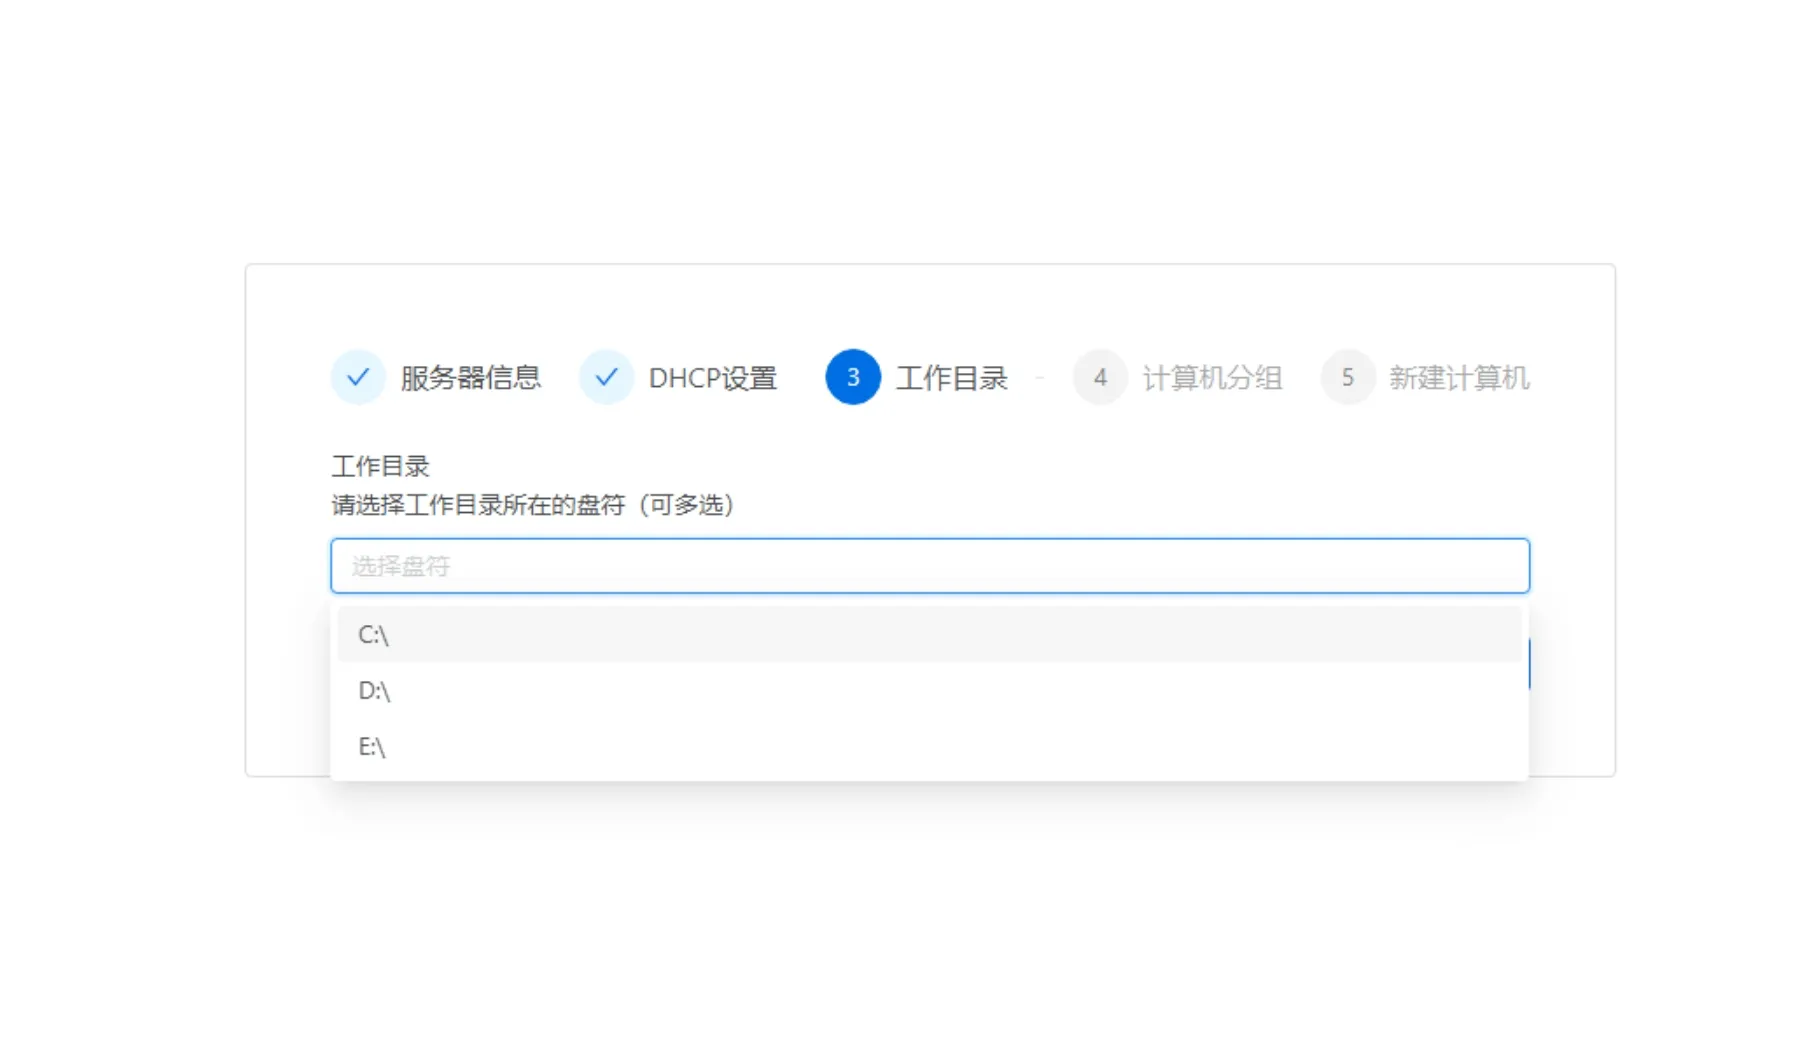
The working directory is the storage directory for client images. You can select multiple at once; building a RAID is recommended.
5) Set the computer group
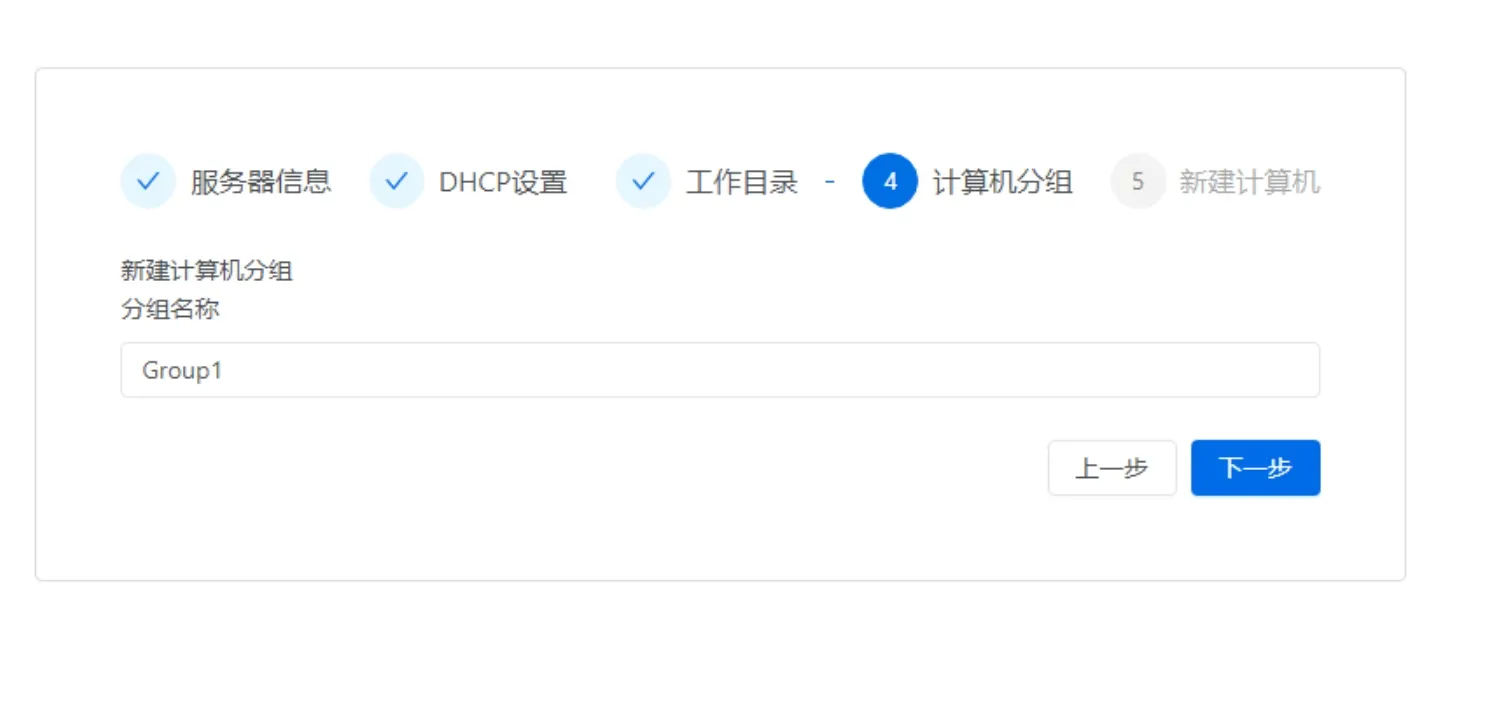
The default computer group, which is also the first computer group.
6) Create a computer
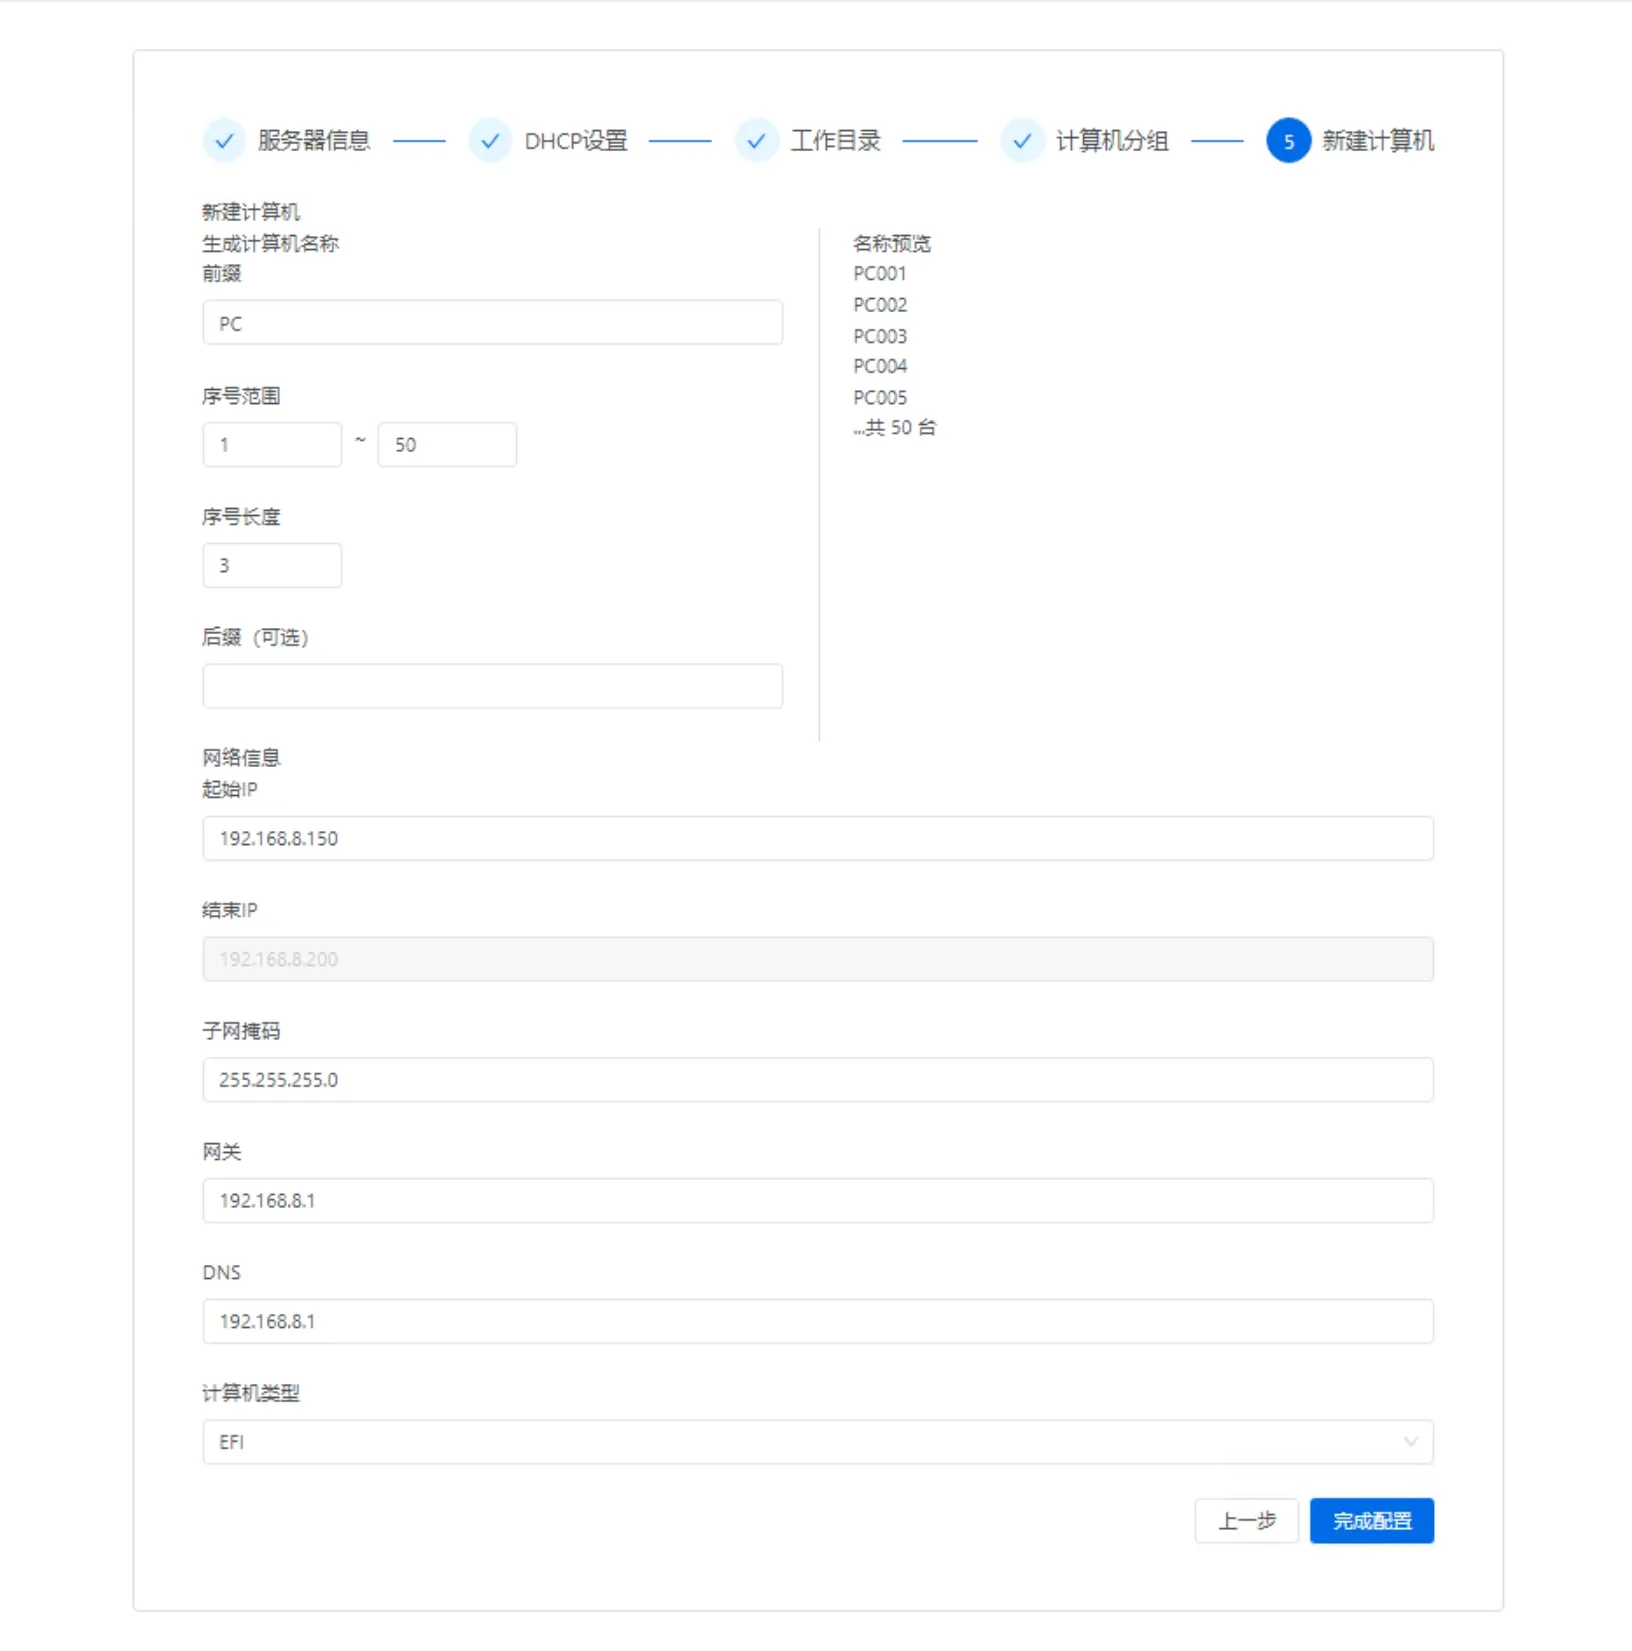
Computer type EFI/BIOS: choose BIOS for very old machines; use EFI for new machines.
7) Done
4. Install the Client
1) Install the client on a template machine with the OS already installed
| Type | Installation Method | Remarks |
|---|---|---|
| Windows client | Install with defaults directly, no special configuration needed | None |
| Linux client | Package and build using the dedicated tool; see Build Image Linux/Domestic | None |
Optimizations and changes the client install makes to the system
| Changes the Windows client install makes to the system | Possible Impact | Reason for Change |
|---|---|---|
| Automatically disables "update system drivers through Windows Update" | Cannot update hardware drivers via Windows Update | 1. Auto-updating the NIC driver during network boot may cause a crash; 2. Prevents various faults caused by driver updates during operation |
| Sets the NIC service start=0 | No impact | Compatible with network boot: when a desktop has not been distributed or distribution failed but class must start, you can network-boot and cache while in use, then sync the full cache later |
| Changes service load order | No impact | Compatible with network boot, same reason as above |
| Intercepts physical disk reads | Affects obtaining SMART info from the physical disk | If you need physical-disk SMART, view the X-drive info directly (the X drive passes through physical-disk SMART); you can also view detailed health under Desktop → SSD Health |
| Disables network discovery | None | Prevents one image serving multiple machines and IP changes within a classroom from causing Win10 to pop up network discovery and block the right-side area |
| Changes the Linux client install makes to the system | Possible Impact | Remarks |
|---|---|---|
| Fully disables NetworkManager | Network cannot be configured within the system; related network tools won't open | Prevents user network configuration from causing IP misconfiguration and connection interruption |
2) After the Windows client install completes, the image upload tool opens automatically
Enter the server IP, username and password; default admin / 123456.
- With a single server, keep the default service selection
- Image name: enter an easy-to-remember name, e.g. win1022h2
- Select partition: the C drive is selected by default; the EFI partition is uploaded automatically along with it, no special setup needed
Do not perform any operation on the system during upload.
After the upload completes, the "Start Upload" button changes from gray to available. The "Warning" can be ignored: after the upload completes it sends multiple messages to close the network disk, and multiple retries will produce a prompt; the data is normal at this point and does not affect use.
3) Apply the image: Console → Desktop → Desktop pool
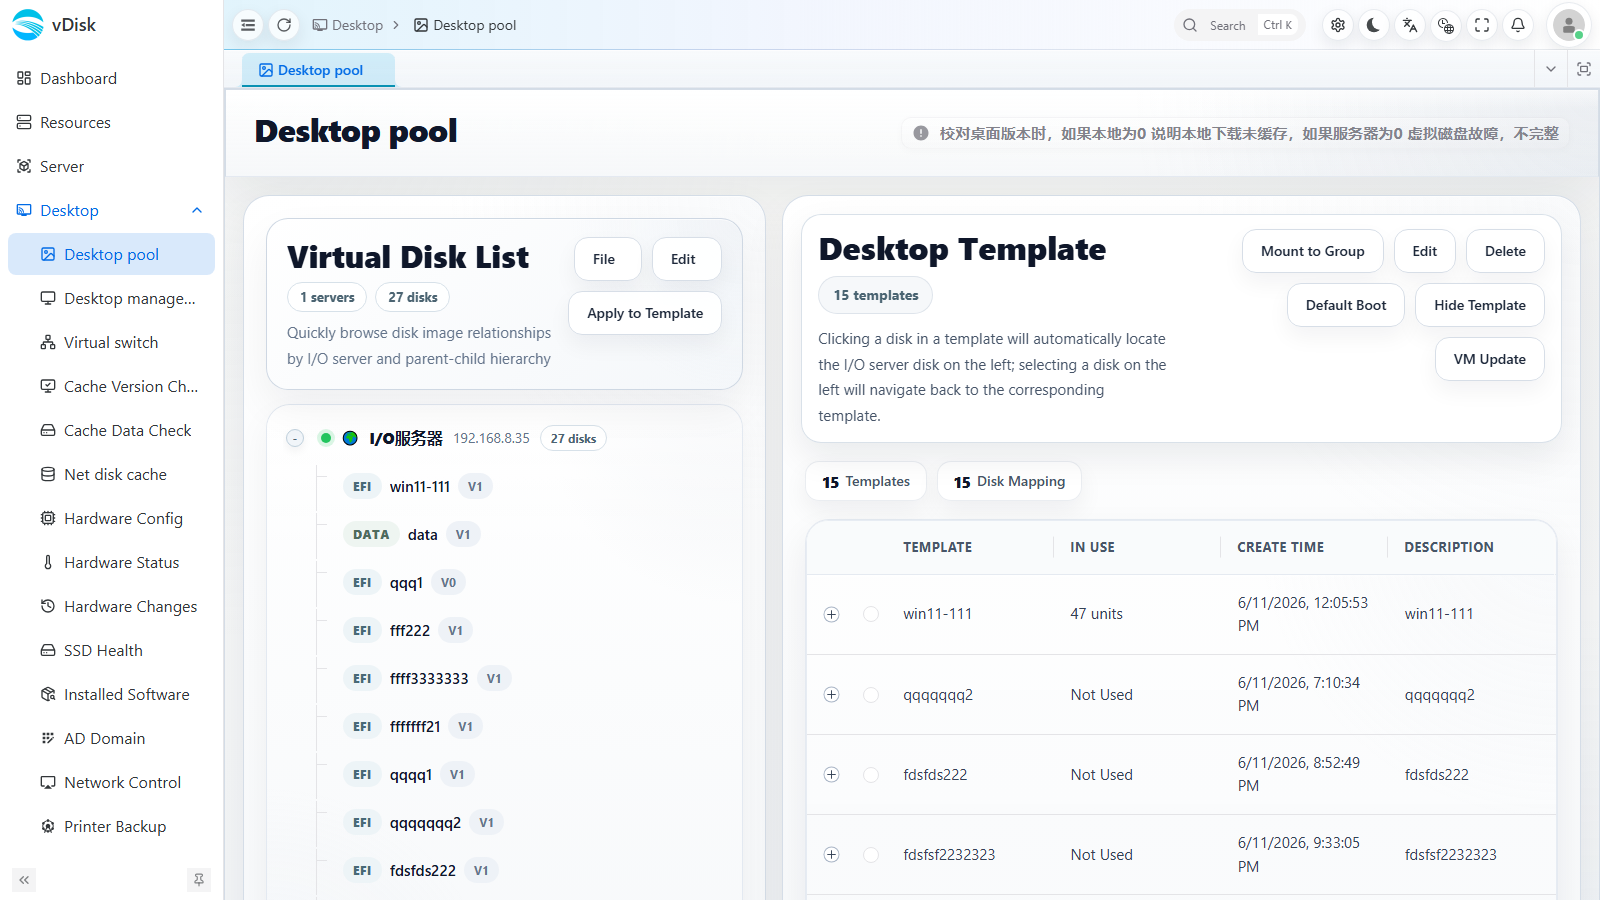
Go to Desktop → Desktop pool. The "Virtual Disk List" on the left is the virtual disk you just uploaded; the number after it (e.g. 1) is the desktop version number, indicating a successful upload.
Select the virtual disk you just uploaded on the left and click Apply to Template, fill in the desktop name and template remarks to generate a desktop template; the template appears in the "Desktop Template" list on the right.
4) Mount the desktop to a group
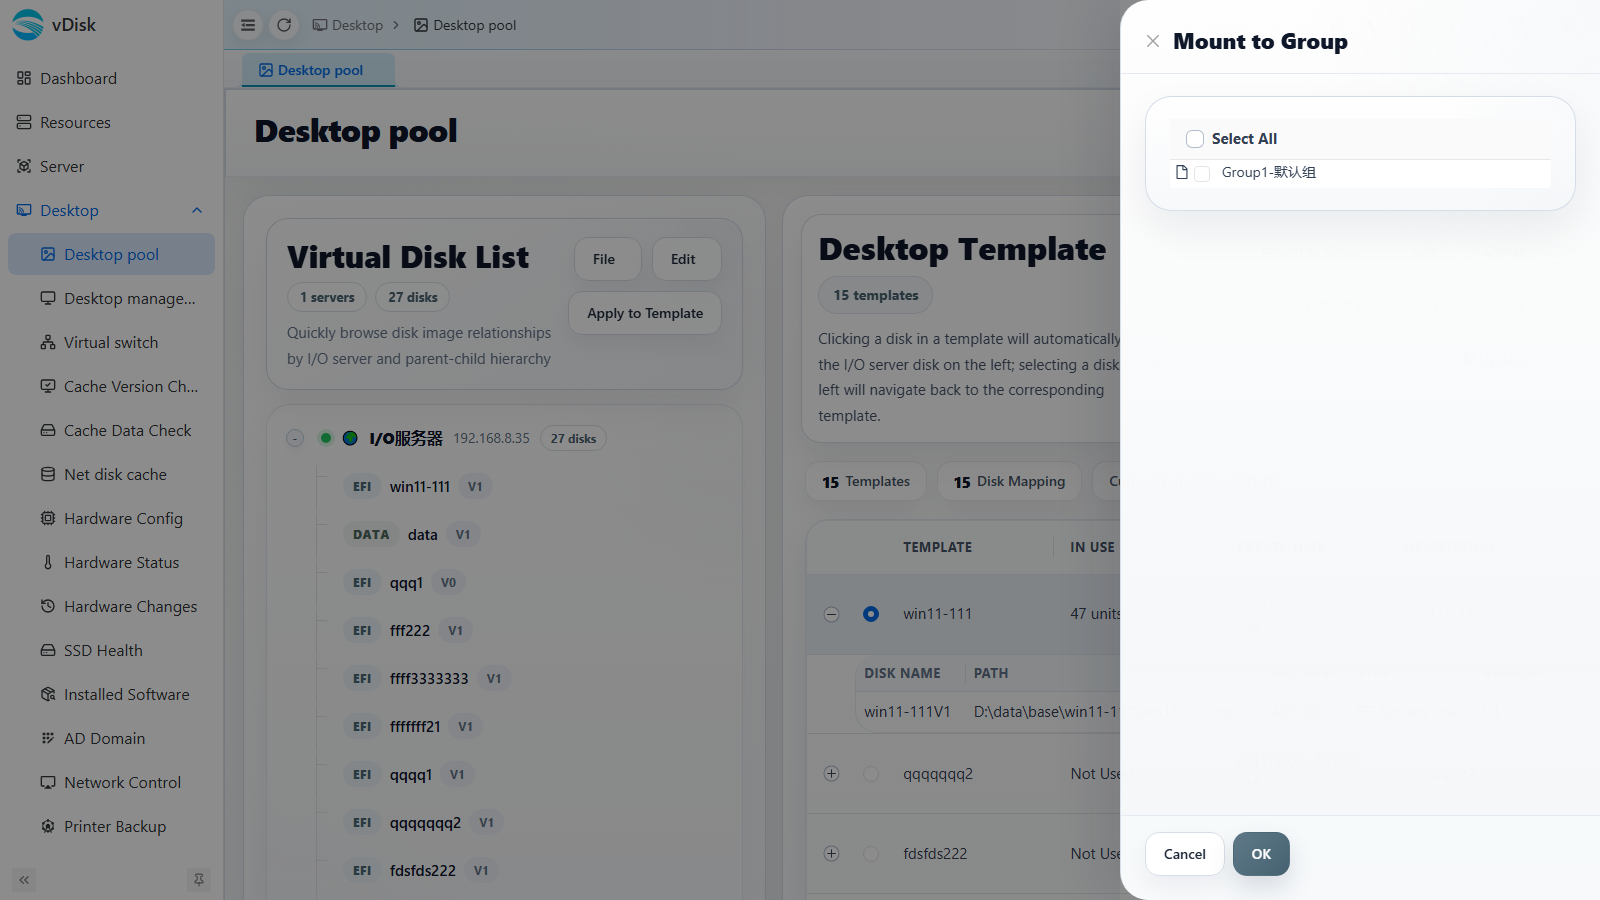
In the "Desktop Template" list on the right, select the template you just generated, click Mount to Group, check the groups to mount, then click OK.
5. Add Computers
1) Create a computer group
Navigate to Desktop → Desktop management.
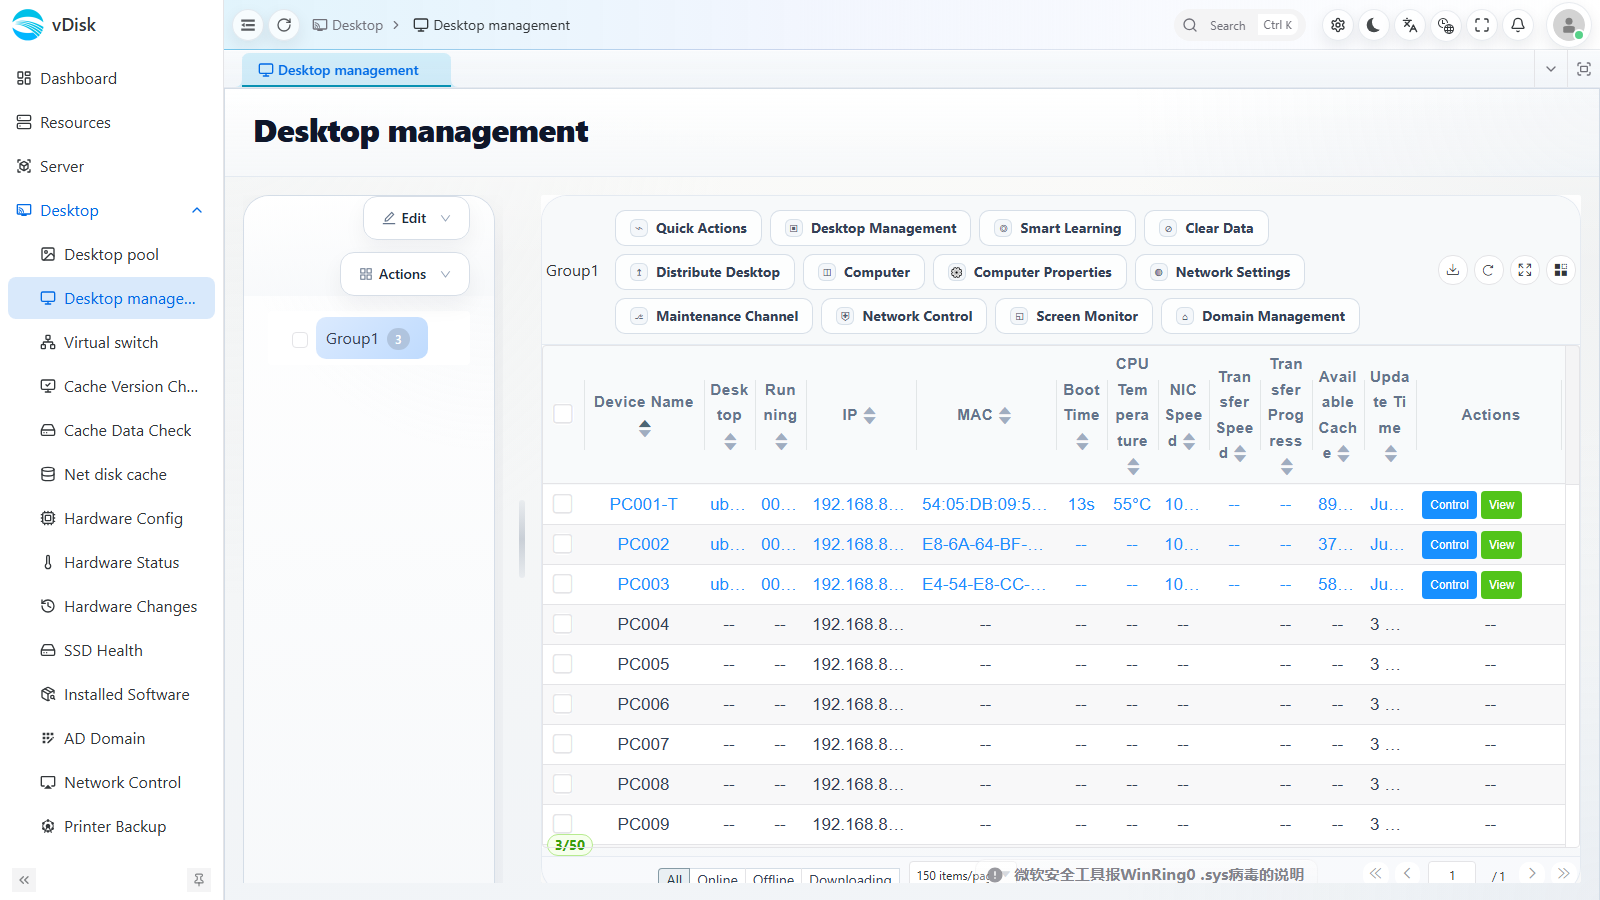
Create a group (i.e. a classroom) in the group area on the left.
2) Create a computer
Navigate to Desktop → Desktop management → Computer → Add.
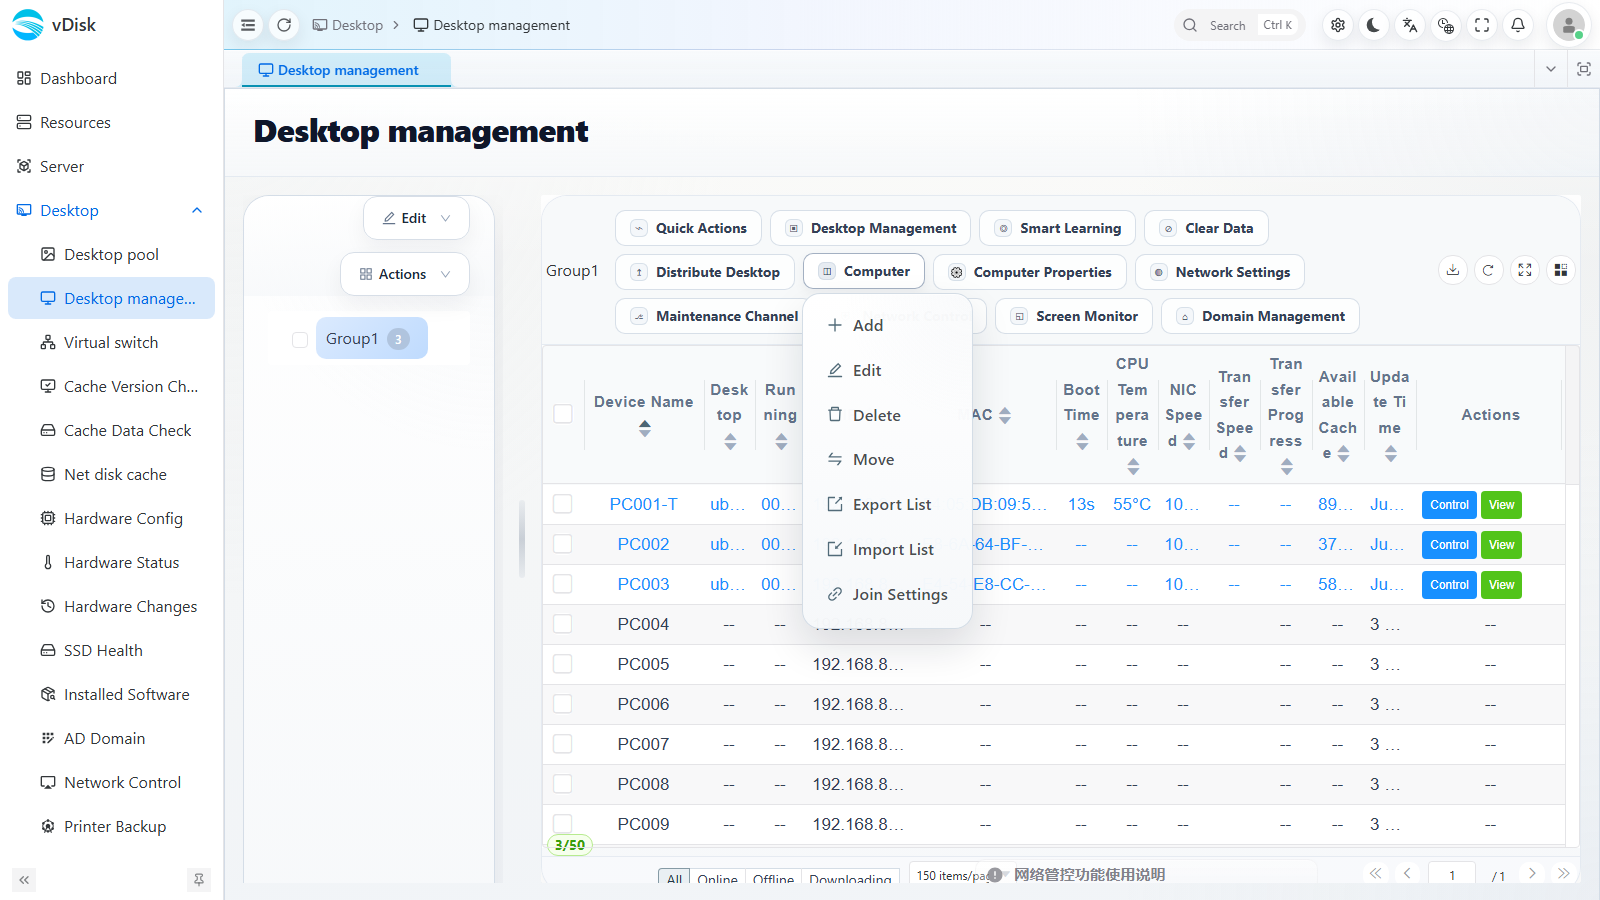
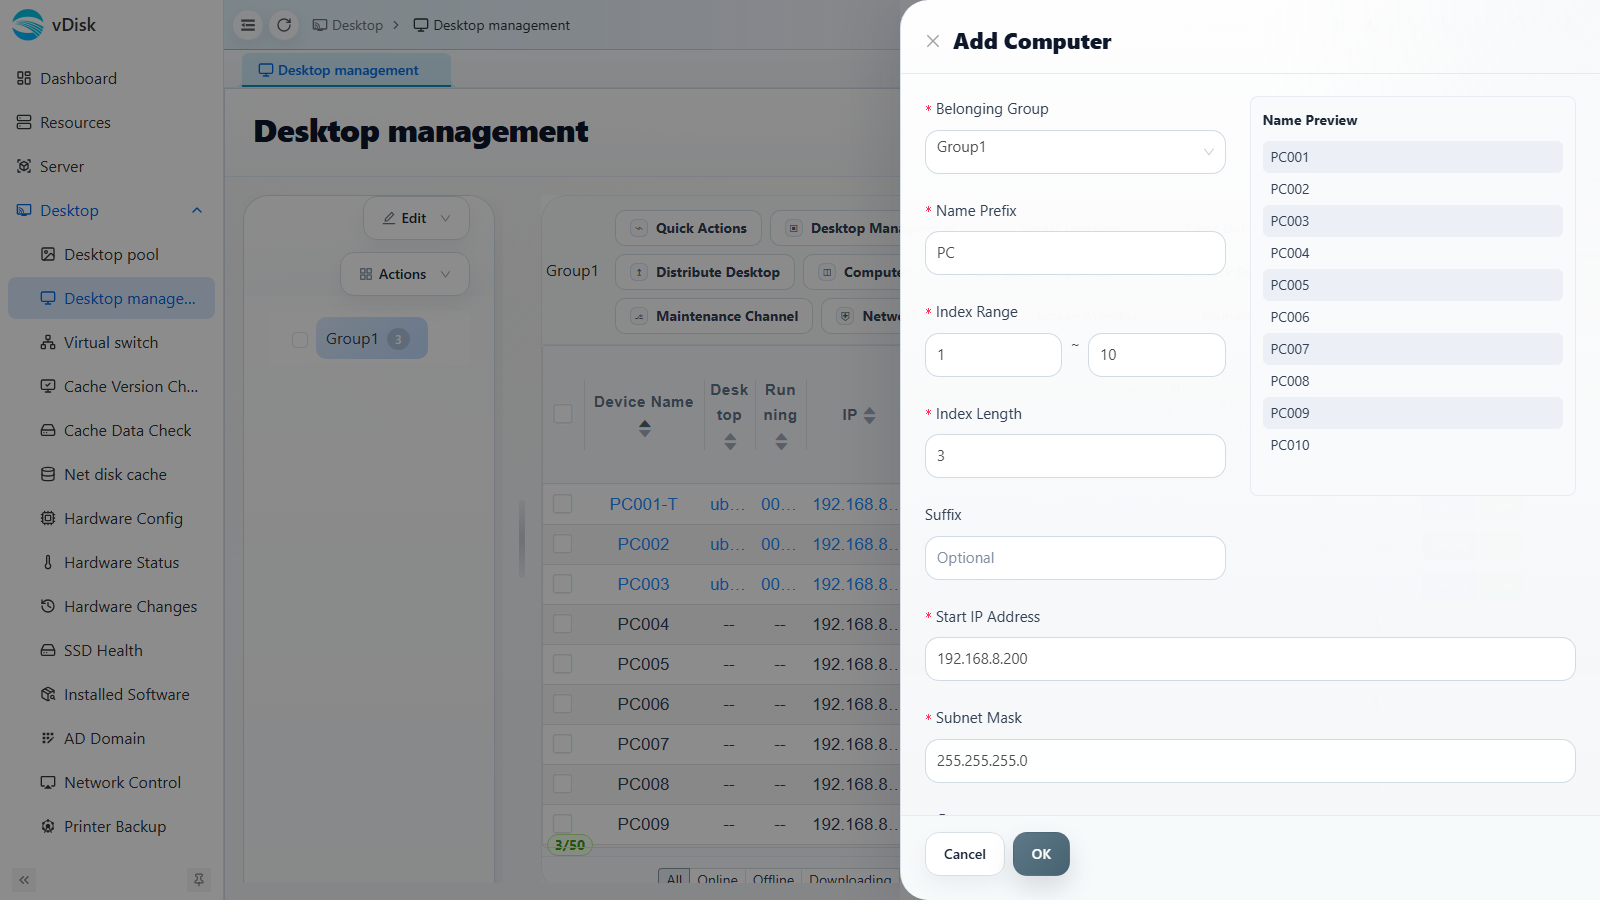
- Group: select a child node; do not create the computer at the root node or an intermediate node
- Name prefix: the computer name prefix; adding the classroom name is recommended, e.g.
202-, for easy distinction- Start IP, subnet mask, gateway, DNS: fill in according to the classroom's actual info
- Computer type: defaults to EFI boot; choose BIOS for old machines; select the CPU architecture by machine (including domestic-chip architectures)
- Maintenance channel: keeping it on is recommended; after download completes it triggers one automatic maintenance and optimizes the system; if you place drivers in the client's
c:\toolsdirectory it can trigger automatic driver installation- Maintenance channel template: once selected, newly created computers automatically apply this maintenance channel template
3) Switch the default join group
Navigate to Desktop → Desktop management → Computer → Join Settings.
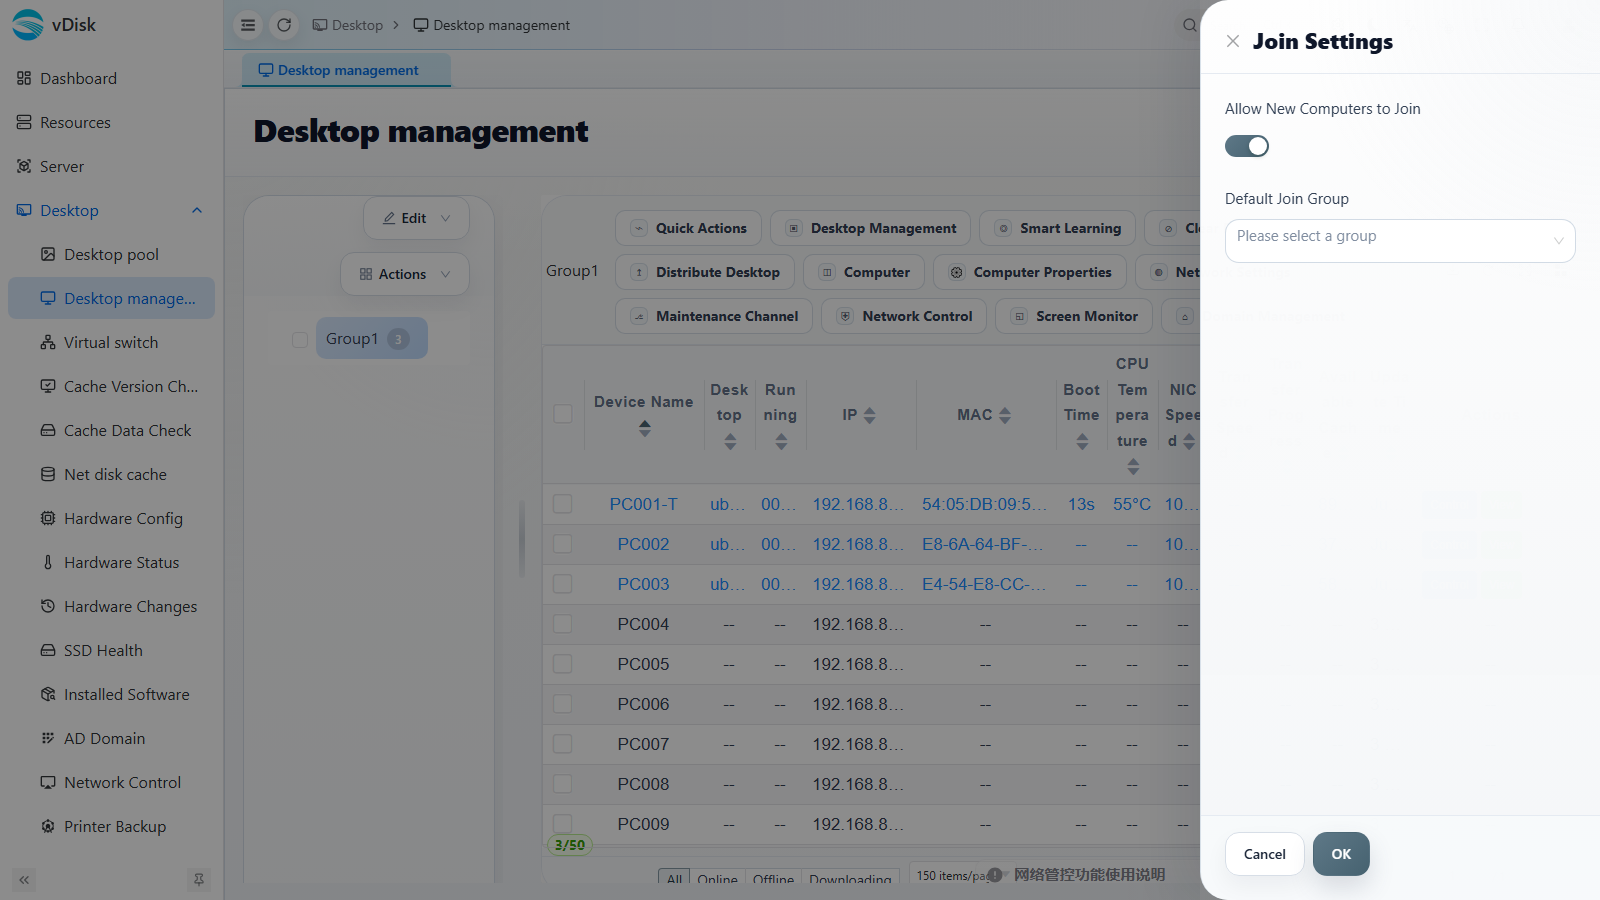
Turn on "Allow new computers to join" and set the "Default join group" to the group you just created.
4-1) PXE boot (server and client on the same LAN)
Quick-access methods for network boot on mainstream computers
| Brand/Type | Key (press repeatedly at power-on) | Remarks |
|---|---|---|
| Lenovo | F12 or Fn+F12 | Some models use F12 to select the boot option |
| Dell | F12 | Press when the Dell logo appears |
| HP | F12 or F9 | Mostly F12 for commercial, F9 for some |
| ASUS | F8 or Esc | Press Esc to enter the boot menu, then select PXE |
| Acer | F12 | Press repeatedly at power-on |
| Huawei | F12 | Mostly F12 for desktops/laptops |
| Xiaomi | F12 | Mostly F12 for laptops |
| Tsinghua Tongfang | F12 | Commonly F12 for the boot menu |
| Hasee | F7 or F12 | Depends on the model |
| Intel NUC | F10 | F10 on some models |
| Generic/Other | F12, F11, F8, Esc | Most motherboards use F12 or Esc |
Disabling Secure Boot on mainstream computers
| Brand/Type | Key to enter BIOS | Secure Boot disable path (approximate) | Remarks |
|---|---|---|---|
| Lenovo | F1 or F2 | Security → Secure Boot → Disabled | Some are under Boot; you must set a password first before changing |
| Dell | F2 | Boot → Secure Boot → Disabled | Or disable via Security → Secure Boot Enable |
| HP | F10 or Esc | System Configuration → Boot Options → Secure Boot → Disabled | Some are under the Security menu |
| ASUS | Del or F2 | Boot → Secure Boot → OS Type to Other OS, or turn off Secure Boot | Some require Advanced → Boot |
| Acer | F2 | Security → Secure Boot → Disabled | Some models under Main or Boot |
| Huawei | F2 or F12 | Security → Secure Boot → Disabled | When on the same screen as the boot options, enter via Security |
| Xiaomi | F2 | Security → Secure Boot → Disabled | Some are in the Boot options |
| Tsinghua Tongfang | Del or F2 | Security / Boot → Secure Boot → Disabled | Depends on the BIOS version |
| Hasee | Del or F2 | Security → Secure Boot → Disabled | Or under the Boot menu |
| Intel NUC | F2 | Boot → Secure Boot → Disabled | Some on the Security page |
| Generic/Other | Del, F2, F1, Esc | Security or Boot → Secure Boot → Disabled | The name may be Secure Boot Enable to turn off |
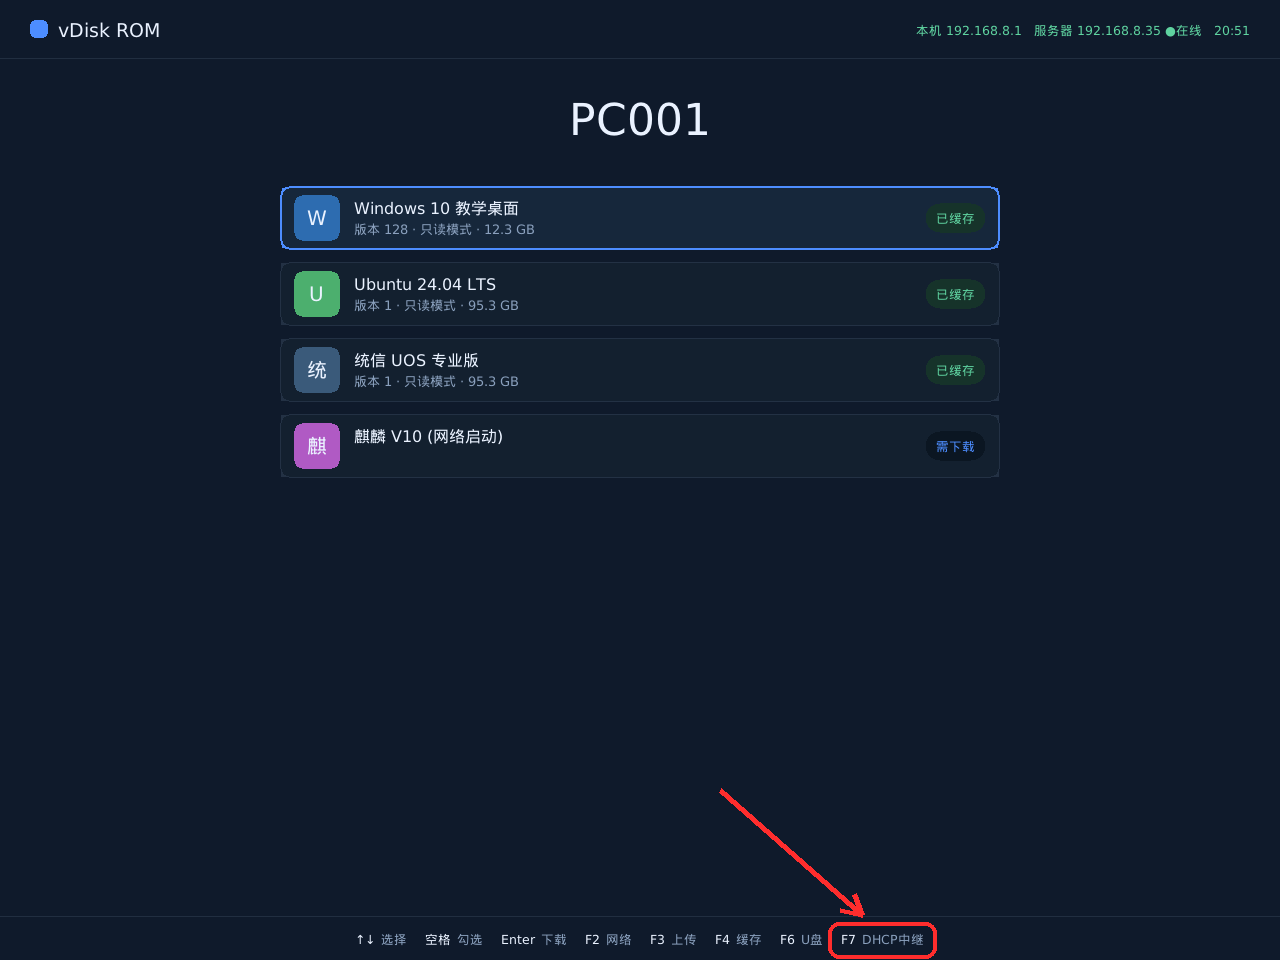
Power on using network boot.
It will automatically enter the ROM after the timeout; if you don't want to wait, press F7 to enter directly.
Select the computer to bind.
- After selecting, you enter the main interface directly
- Repeat the steps above to add all the computers in the entire classroom; when adding, add them correctly by the computer seating order
- When the computer list is too long, press F5 to refresh the list before selecting
4-2) Use a USB drive to boot into ROM (server and computer room not on the same LAN: across VLAN, campus, or Internet)
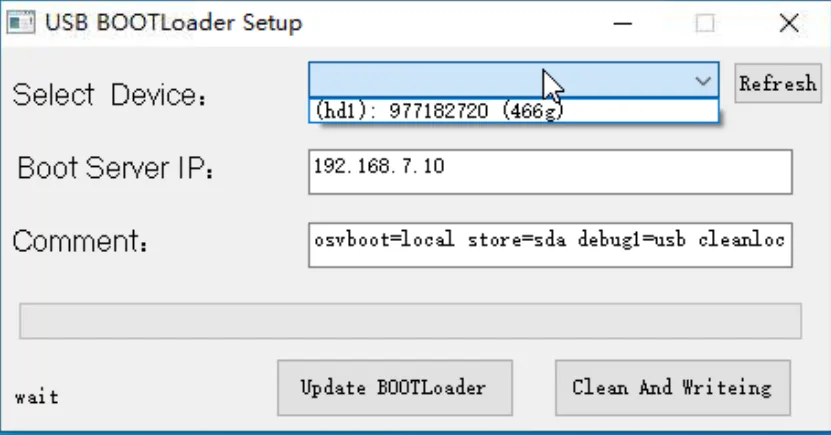
- Creating a bootable USB drive will erase the USB data
- At "select device", make sure you select the USB drive
- At "boot server ip", enter the server IP
4-2-1) Use the USB drive to boot the first computer
Quick-access methods for the boot menu on mainstream computers
| Brand/Type | Key (press repeatedly at power-on) | Remarks |
|---|---|---|
| Lenovo | F12 or Fn+F12 | Some models use F12 to select the boot option, then choose USB |
| Dell | F12 | Press when the Dell logo appears, select USB or UEFI USB |
| HP | F9 or F12 | Mostly F9 for the boot menu, F12 for some |
| ASUS | F8 or Esc | Press Esc to enter the boot menu, then select the USB drive |
| Acer | F12 | Press repeatedly at power-on, select USB in the menu |
| Huawei | F12 or F7 | Mostly F12 for desktops/laptops |
| Xiaomi | F12 | Enter the boot menu, then select the USB device |
| Tsinghua Tongfang | F12 | Commonly F12 to bring up the boot menu |
| Hasee | F7 or F12 | Depends on the model; select USB boot |
| Intel NUC | F10 | F10 is the boot menu on some models |
| Generic/Other | F12, F11, F8, Esc | Mostly F12 or Esc to enter the boot menu and select the USB drive |
Disabling Secure Boot on mainstream computers
| Brand/Type | Key to enter BIOS | Secure Boot disable path (approximate) | Remarks |
|---|---|---|---|
| Lenovo | F1 or F2 | Security → Secure Boot → Disabled | Some are under Boot; you must set a password first before changing |
| Dell | F2 | Boot → Secure Boot → Disabled | Or disable via Security → Secure Boot Enable |
| HP | F10 or Esc | System Configuration → Boot Options → Secure Boot → Disabled | Some are under the Security menu |
| ASUS | Del or F2 | Boot → Secure Boot → OS Type to Other OS, or turn off Secure Boot | Some require Advanced → Boot |
| Acer | F2 | Security → Secure Boot → Disabled | Some models under Main or Boot |
| Huawei | F2 or F12 | Security → Secure Boot → Disabled | When on the same screen as the boot options, enter via Security |
| Xiaomi | F2 | Security → Secure Boot → Disabled | Some are in the Boot options |
| Tsinghua Tongfang | Del or F2 | Security / Boot → Secure Boot → Disabled | Depends on the BIOS version |
| Hasee | Del or F2 | Security → Secure Boot → Disabled | Or under the Boot menu |
| Intel NUC | F2 | Boot → Secure Boot → Disabled | Some on the Security page |
| Generic/Other | Del, F2, F1, Esc | Security or Boot → Secure Boot → Disabled | The name may be Secure Boot Enable to turn off |
- On the first USB boot, it prompts you to enter the server IP, client IP, and other info; after connecting to the server normally, it enters the computer selection process, and you enter the main interface after selecting
- When selecting a computer, pay attention to the numbering order; the number is an important reference for marking the computer's location in daily management
- If booting fails, first confirm that is disabled
4-2-2) Use the first already-booted computer to enable DHCP relay
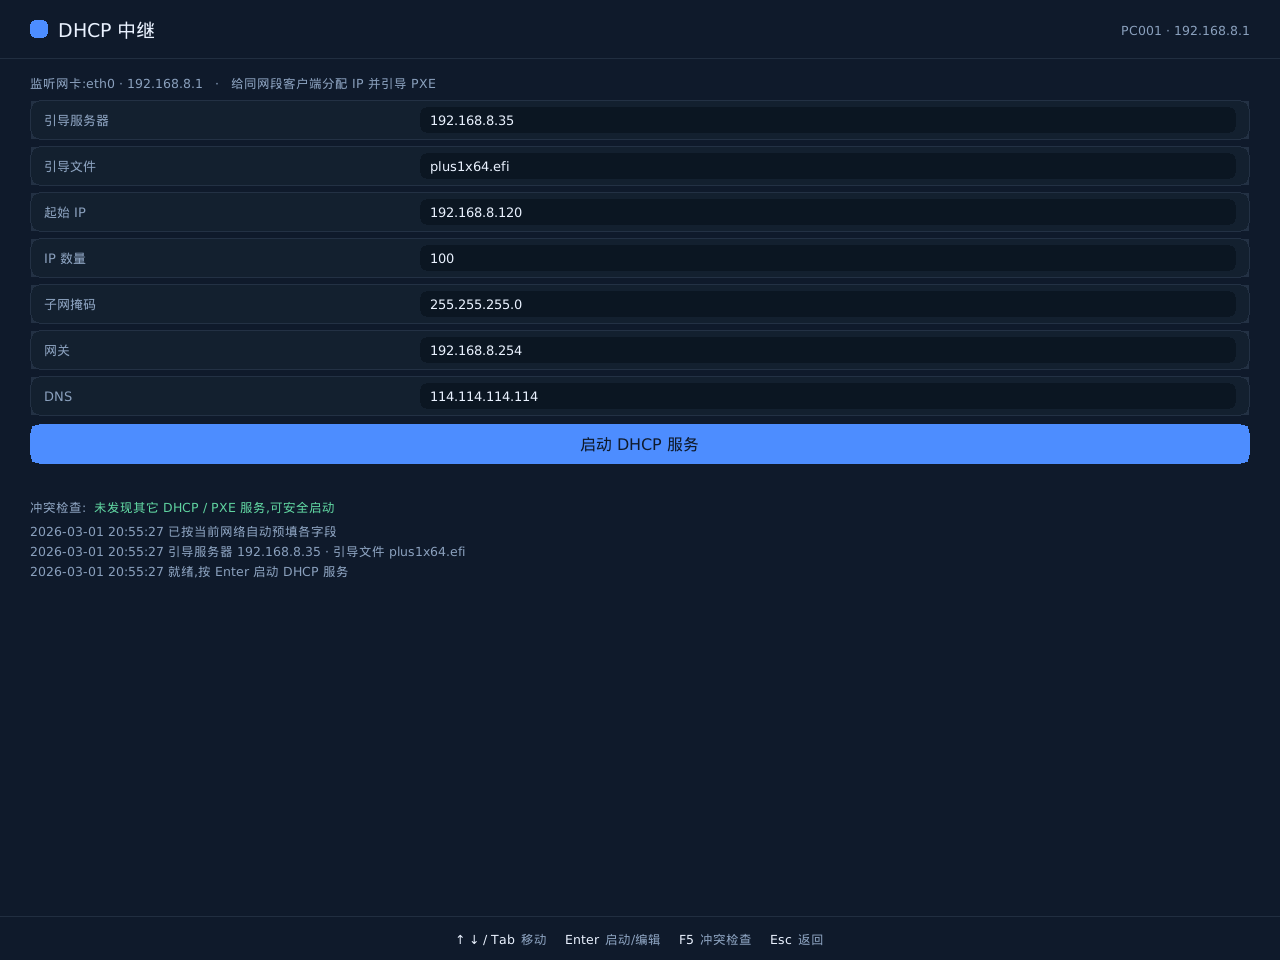
- On first entry, press F2 to set the LAN IP info and server IP; after confirming, it connects to the server and enters the computer binding page
- After binding succeeds, press F7, or click the DHCP relay menu
- DHCP relay automatically fills in the relevant info based on the current network environment; when no changes are needed, just click Start Relay
4-2-3) Other computers join via network boot
Other computers boot into ROM via network boot; refer to section 4-1 for the method.
6. Download the Desktop (Distribute)
Navigate to Desktop → Desktop management → Distribute Desktop → Distribute Desktop.
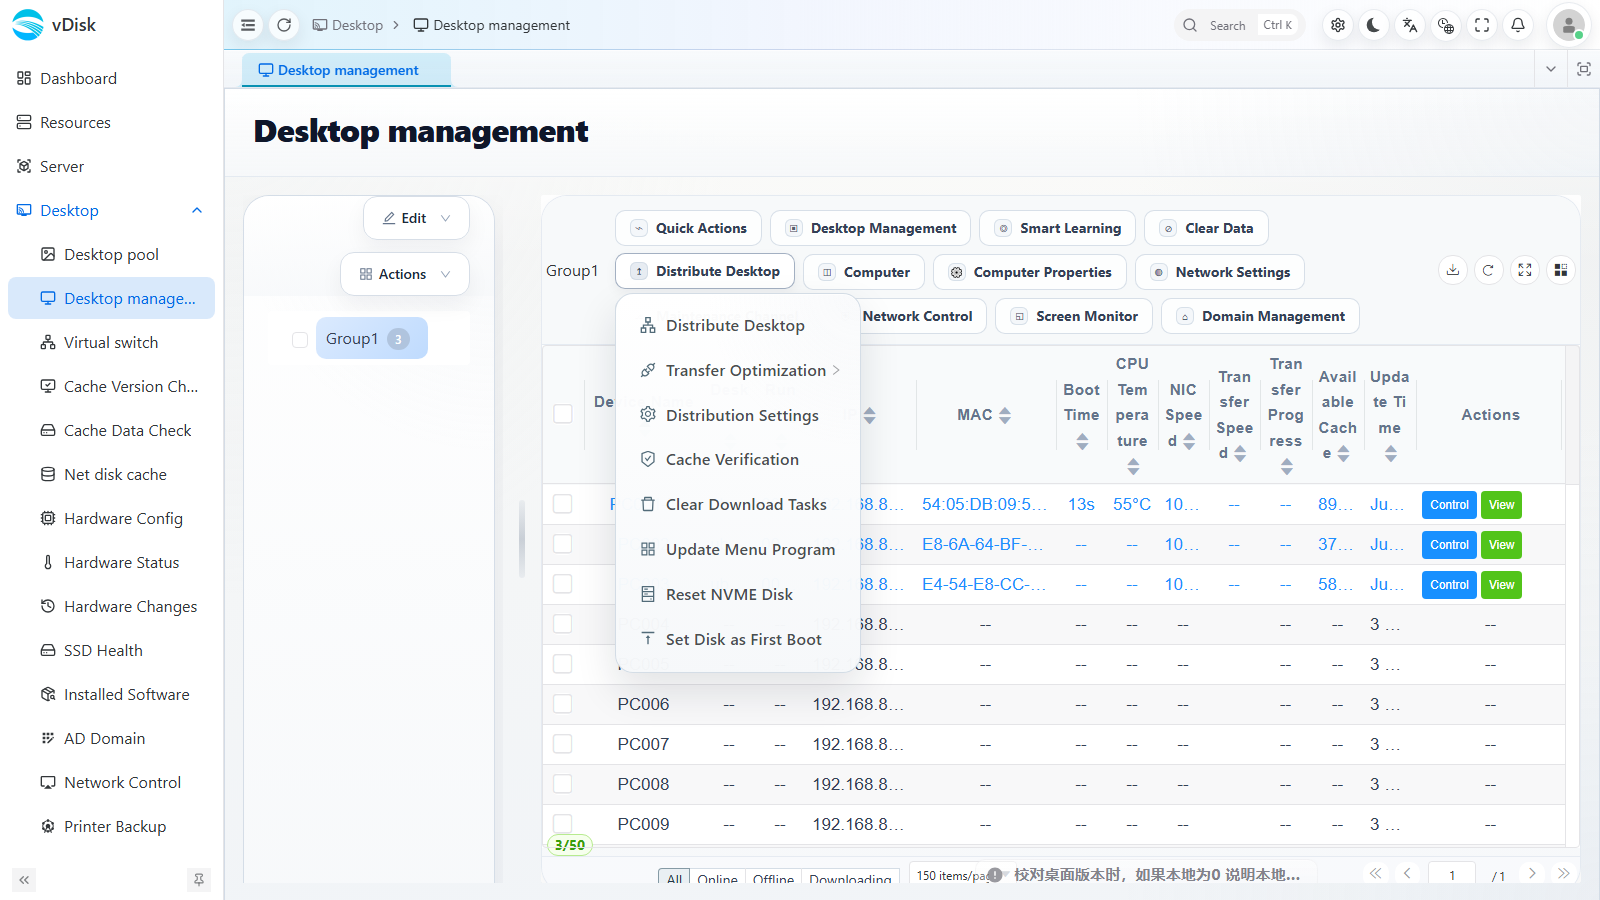
- Check the computers to distribute to and click Distribute Desktop; the system automatically distinguishes computers of different network speeds for chained distribution
- If the data to download is larger than the locally available capacity, the download will fail directly
- While the download is incomplete,
- The same menu also includes Transfer Optimization, Distribution Settings, Cache Verification, Clear Download Tasks and other features
7. Network Boot (in step 6, once the download starts and has speed, simply reboot the computer)
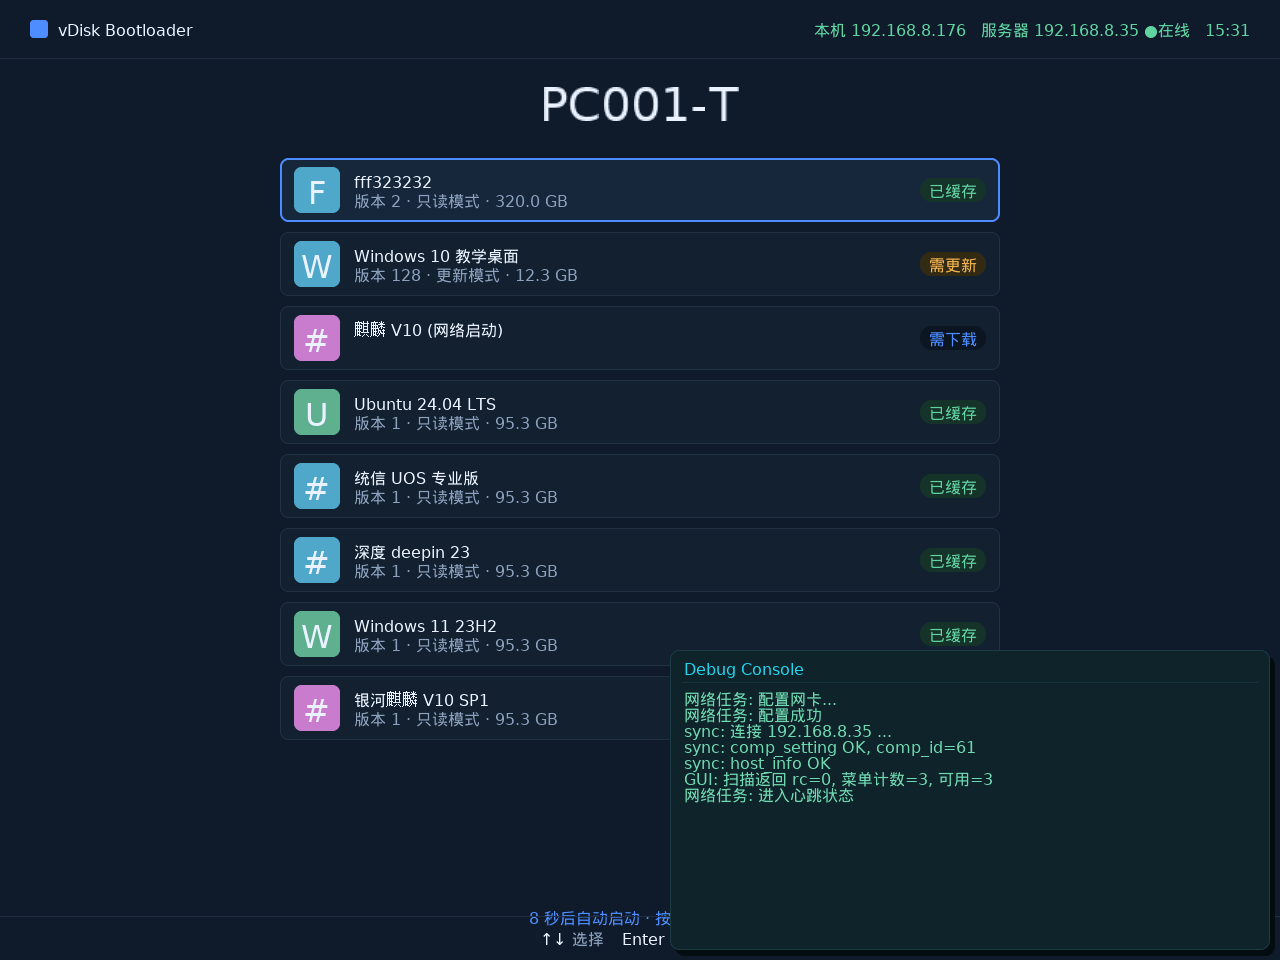
- Network boot caches while booting; once the download completes it automatically switches to local boot
- Network boot is mainly used for emergency boot (desktop not fully downloaded), insufficient disk capacity, and special security scenarios; since it cannot boot offline, please still perform the download for normal use
- If auto-download pops up at power-on, you can clear it under Desktop → Desktop management → Distribute Desktop → Clear Download Tasks. When network resources are limited, downloading while network-booting will be very laggy
- The same computer supports a "cache boot + network boot" combination; for a desktop not used long-term, you can define network boot only