Using the Boot Menu
Go to Desktop -> Desktop management -> Distribute Desktop -> Boot Menu Settings
On the Desktop management page, after selecting the target group / terminal, click Boot Menu Settings in the Distribute Desktop dropdown menu in the toolbar; a settings drawer pops up on the right.
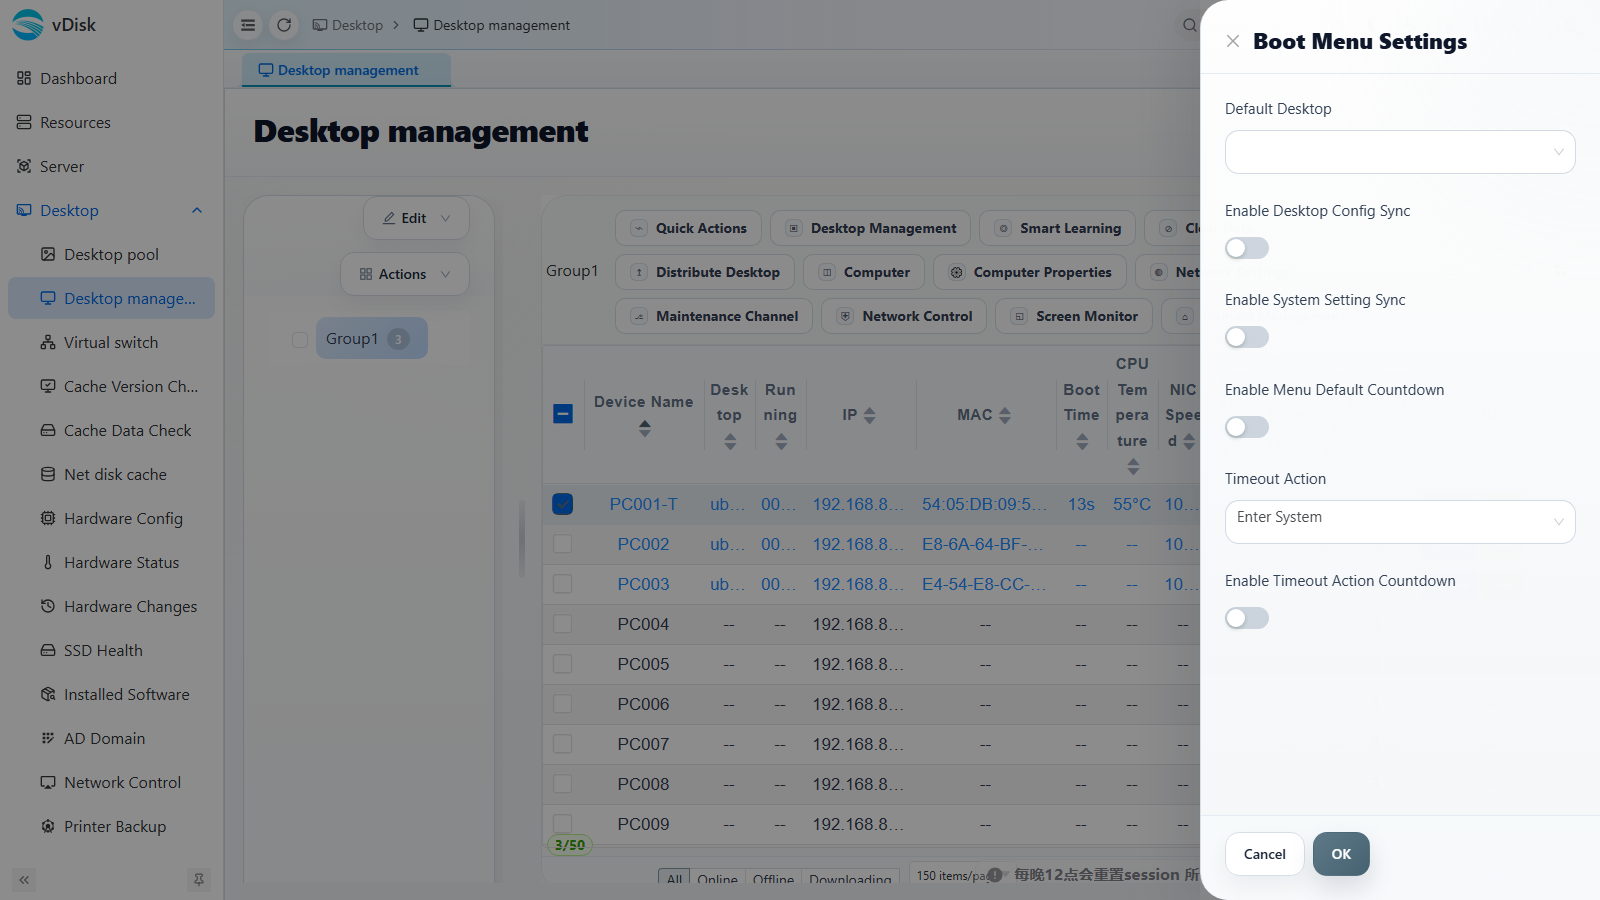
Default Desktop: The system entered by default in the boot menu.
Enable Desktop Config Sync: Connects to the server in the boot menu and syncs desktop-related configuration, such as IP, access mode, computer settings, etc. .
Enable System Settings Sync: Syncs system-level settings to the terminal.
Enable Menu Default Countdown: When enabled, the menu appears when the client boots; when disabled, the system boots directly without showing the menu.
Timeout Action: The default action after the countdown ends; it can be set to enter the system, enter the ROM, shut down, etc. When set to shut down, the computer automatically powers off after starting if no selection is made.
Enable Timeout Action Countdown: Enables a separate countdown for the timeout action.
Client Boot Interface (Terminal Side)
After a diskless terminal powers on, it shows the vDisk Bootloader interface listing the systems this computer can boot:
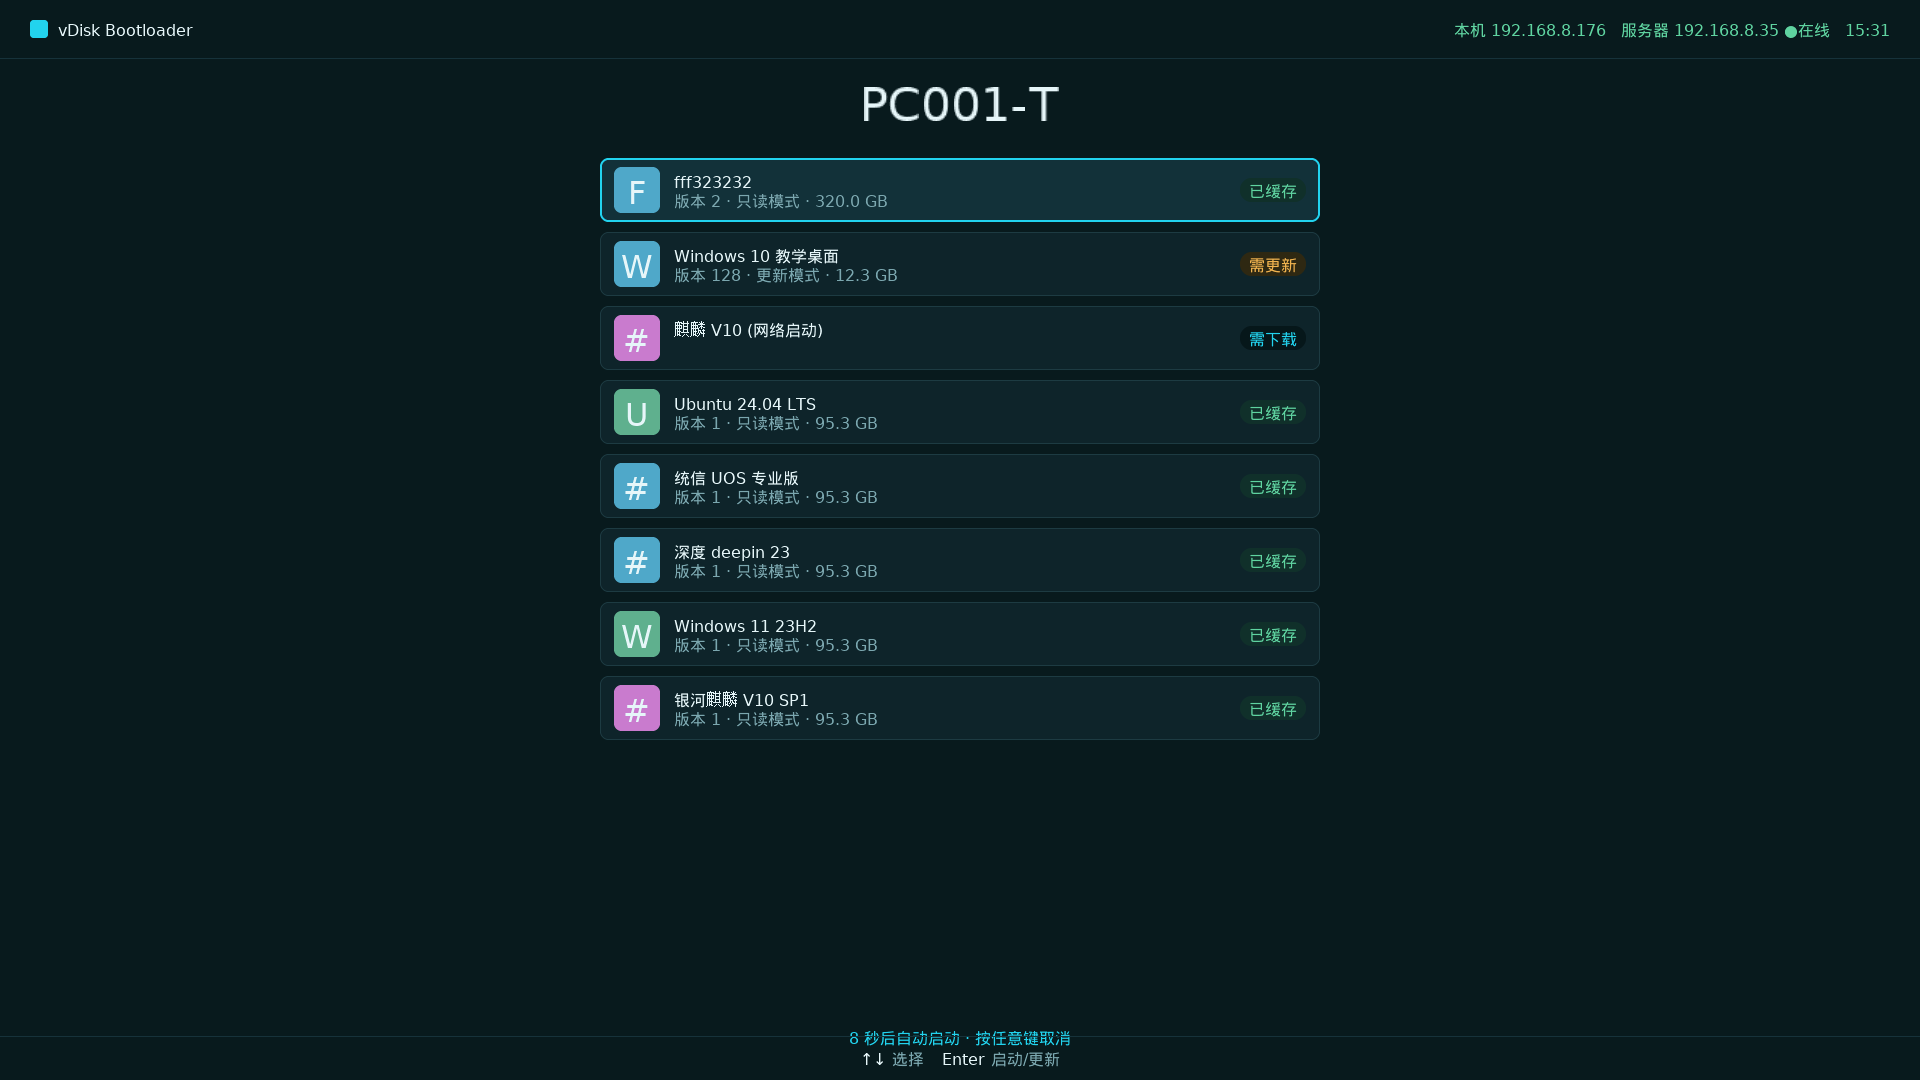
Interface elements:
- Top bar: product logo on the left; local IP, server IP, online status (●Online) and current time on the right.
- Computer name: shown large and centered.
- System cards: one card per bootable system, with icon, system name,
version · access mode · size, and a status badge on the right (Cached / Update / Download). The selected card has a highlighted border. - Bottom hint: lists the currently available keys.
Key operations
| Key | Function |
|---|---|
| ↑ / ↓ | Move selection |
| Enter | Boot the selected system (applies update if available) |
| F2 | Open network configuration (see below) |
When the countdown is enabled, the bottom shows "Auto-boot in N s · press any key to cancel"; on timeout the default system boots automatically; press any key to cancel and choose manually.
F2 — Network configuration (important)
Press F2 on the boot interface to open the network configuration form, letting you change this machine's network settings directly at the terminal without entering the OS:
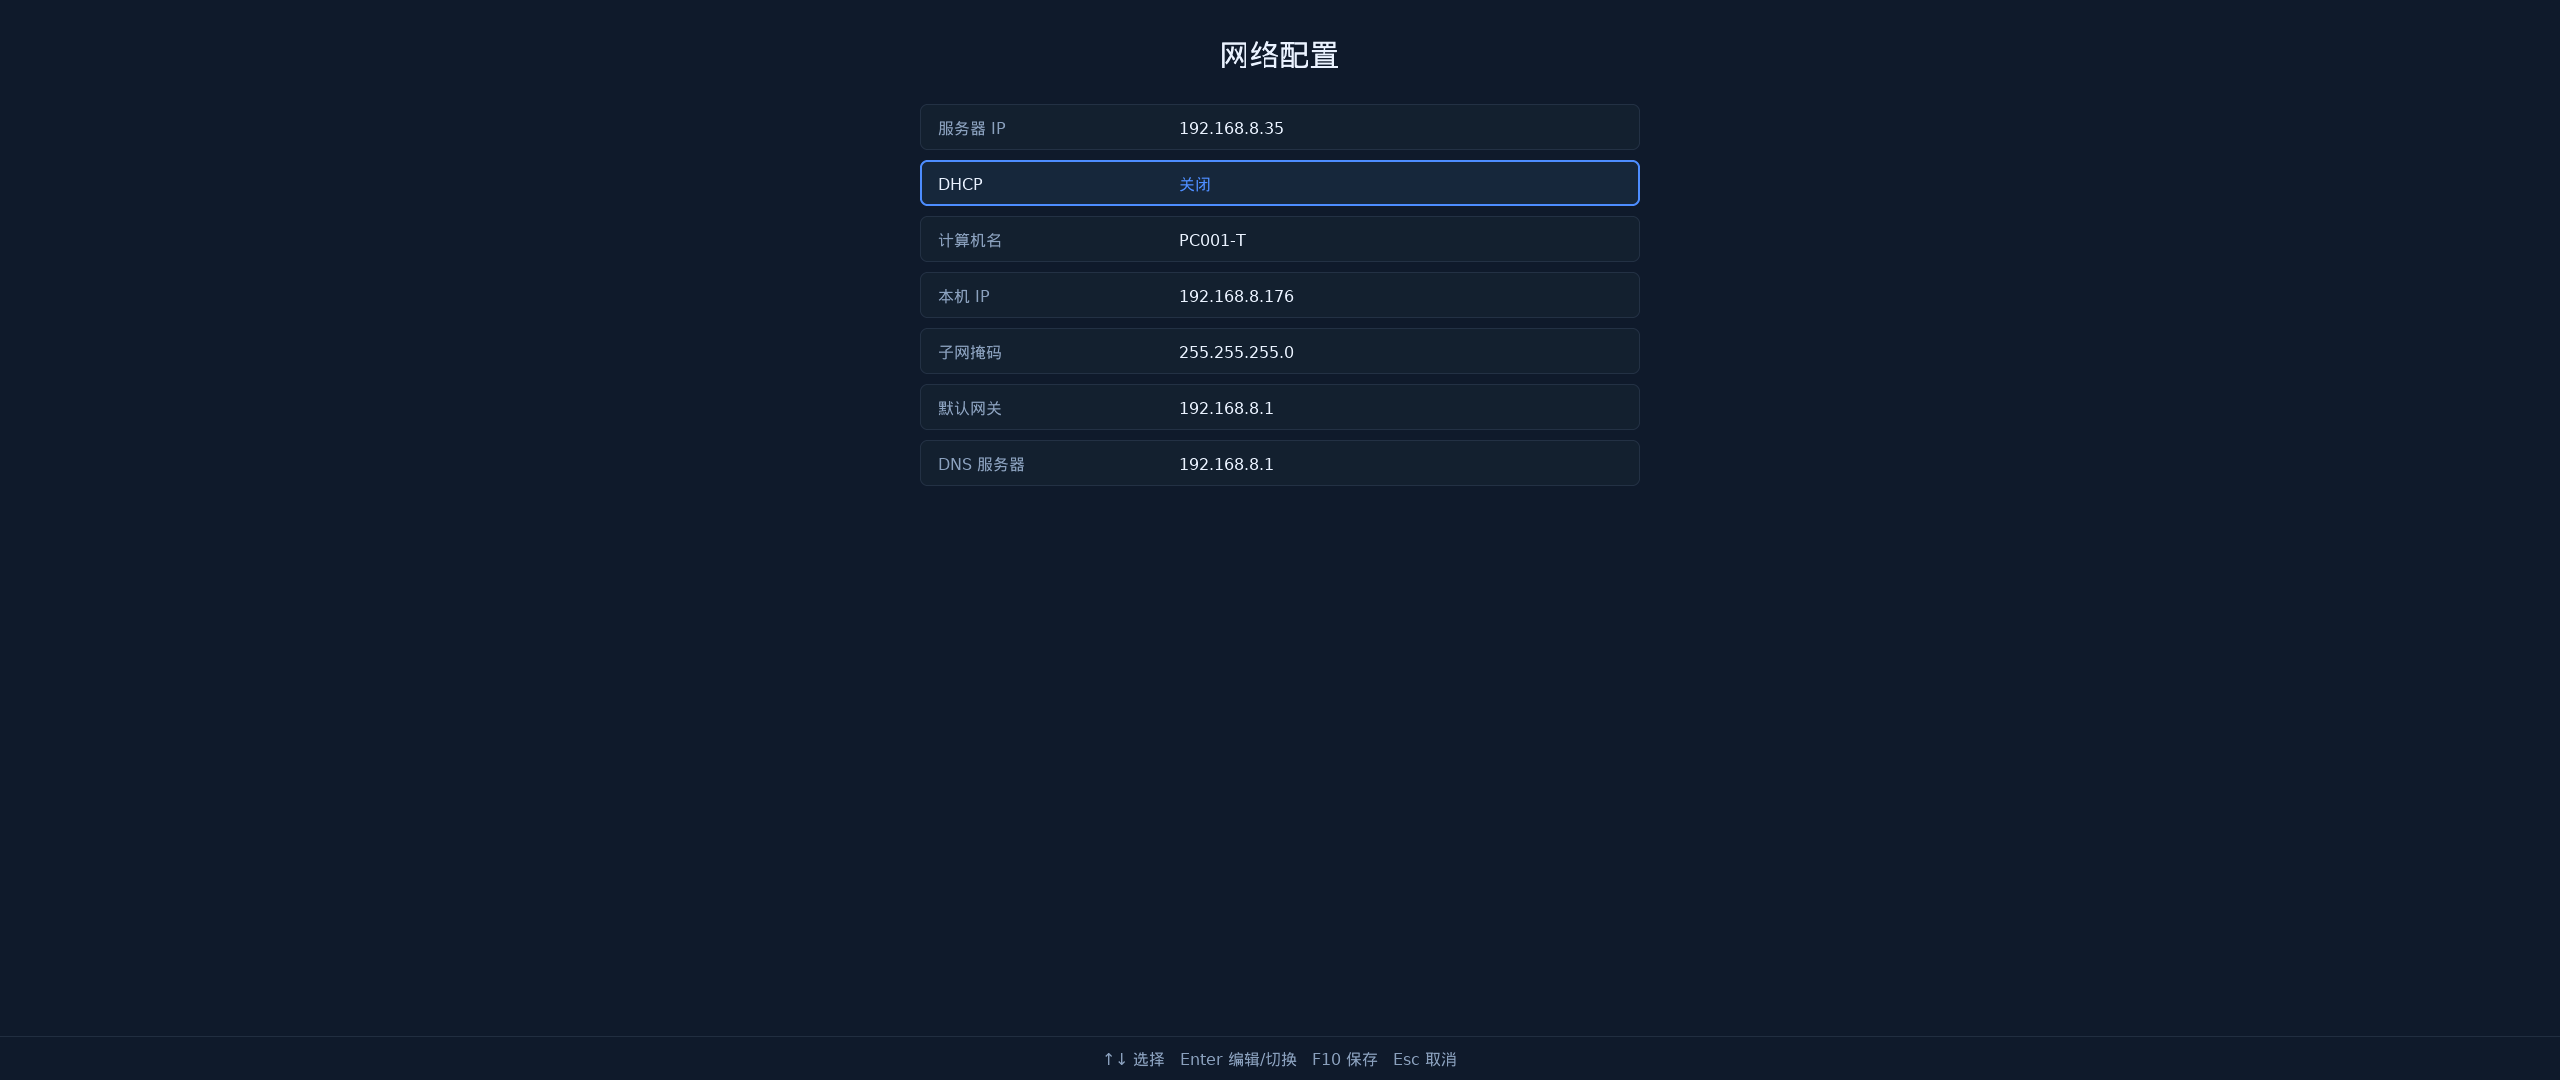
Form fields (Server IP is first — the one most often adjusted on site):
- Server IP — vDisk server address
- DHCP — when on, Local IP / Subnet mask / Gateway / DNS are obtained automatically from the server (shown as "Auto", no need to fill them in); when off, fill in the items below manually
- Computer name
- Local IP
- Subnet mask
- Gateway
- DNS server
Operation:
| Key | Function |
|---|---|
| ↑ / ↓ | Select the field to edit |
| Enter | Enter / leave editing of the field (cursor at end while editing) |
| Backspace | Delete a character |
| F10 | Save all changes |
| Esc | Discard changes and return |
- Each field is pre-filled with its current value; just edit in place.
- If the computer has an admin password, F2 asks for it first; editing is allowed only after it passes.
- Saved settings are written to local persistent storage and kept across reboots; changing Server IP / Local IP lets the terminal reach the correct server.
- F2 is a hidden shortcut, not shown in the bottom hint bar, to avoid accidental use.