Create & Upload a Windows Image
Windows image capture and upload are done in the client packaging tool (disk2image); once uploaded, the image is viewed, applied and distributed to computers under Desktop → Desktop pool in the web console.
1) Install the client
Install the client on a Windows physical machine or VM that already has the OS installed. Keep the install options at their defaults.
Please contact customer service to obtain the client.
2) The image tool pops up automatically after install
When installation finishes, the image tool opens automatically. Fill in the server connection details:
Enter the IP, username and password of the vDisk boot server. The default account is
admin/123456.
| Field | Description |
|---|---|
| Service | Keep the default for a single-server setup |
| Image name | Enter an easy-to-remember name, e.g. win1022h2 |
| Partition | C: is selected by default; the EFI partition is uploaded automatically, no extra setup needed |
3) Upload the image
Confirm the settings and start the upload:
Do not operate the system during the upload.
When the upload finishes, the "Start upload" button turns from grey to clickable. Ignore the warning at the end — on completion the system sends several "close network disk" messages and a retry prompt may appear; the data is intact and unaffected.
4) View and apply the image in the Desktop pool
After the upload, log in to the web console and go to Desktop → Desktop pool. The Virtual Disk List on the left shows the image you just uploaded, and the Desktop Template panel on the right shows the template-to-image mapping.
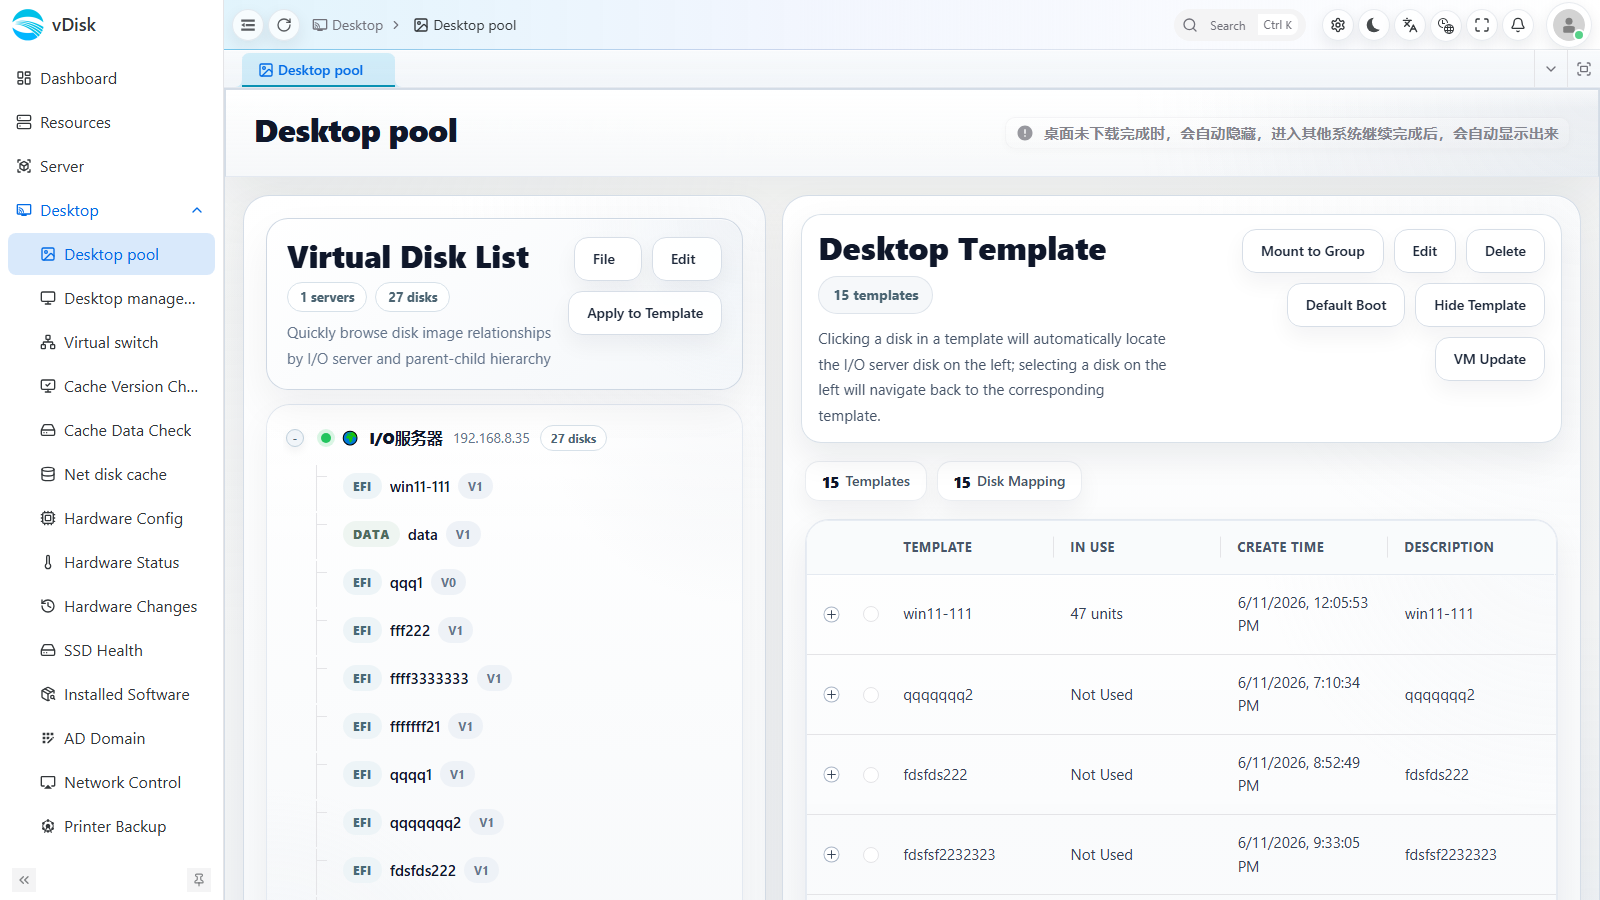
Steps:
- Select the newly uploaded image on the left and click Apply to Template to generate a desktop template.
- Select that template on the right and click Mount to Group to mount it to the target computer group.
- To make it the default boot entry, select the template and click Default Boot.
5) Distribute the desktop to computers
Go to Desktop → Desktop management, select the target computers and click Distribute Desktop for a chained distribution. Once the download completes, reboot the computer to use it.
6) Network boot (emergency boot)
To use a desktop immediately before the download is complete, start the distribution and, once there is download speed, reboot the computer directly for a network boot:
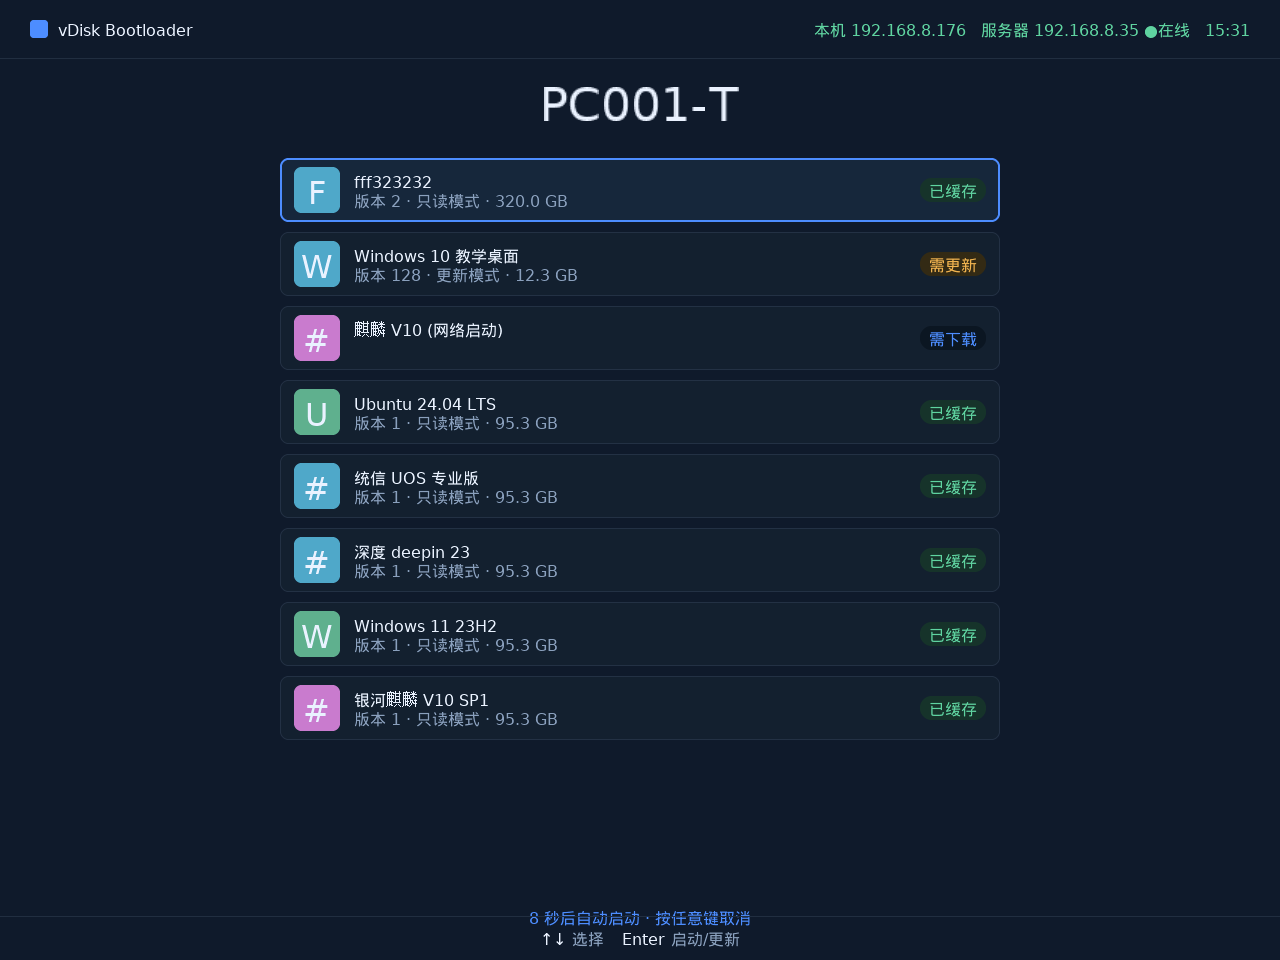
- Network boot caches and boots at the same time; once the download completes it converts to local boot automatically.
- Network boot is mainly for emergencies (desktop not yet downloaded), insufficient disk capacity, or security scenarios. It cannot boot offline, so for normal use finish the download first.
- If an auto-download pops up at startup, clear it under Console → Desktop → Desktop management → Clear Data. With limited network resources, downloading a desktop during network boot makes operation laggy.
- A single computer supports a "cache boot + network boot" combination; for rarely used desktops you may define network boot only.
If the server is not yet installed, see Quick Installation for the full deployment guide.