How to Use Login Authentication for Real-Name Login Records
Login Authentication is used to verify identity and register real-name information before a user enters the desktop, effectively implementing "real-name login" management requirements. Once enabled, the terminal displays an authentication screen before logging in to the desktop, and only authenticated personnel may use the machine; at the same time, the system fully records the person, device, time, and other information for each login, facilitating auditing and traceability.
The related features are concentrated under the Login Authentication menu in the left of the console, containing three sub-items: Login Records, Login Settings, and Announcements; personnel real-name information is maintained in this module's personnel management.
1. Enable Login Authentication
Go to Console → Desktop → Desktop management → Computer Properties → Login Authentication, and enable authentication for the target computer.
Select the mode to authenticate in: by default, authentication is performed only in Restore Mode; when the terminal works in Read-Write Mode (mostly used for exams and similar environments), authentication is generally not required.
2. Login Settings
Go to Console → Login Authentication → Login Settings to open the "Machine Login Settings" page and configure the authentication method and login behavior.
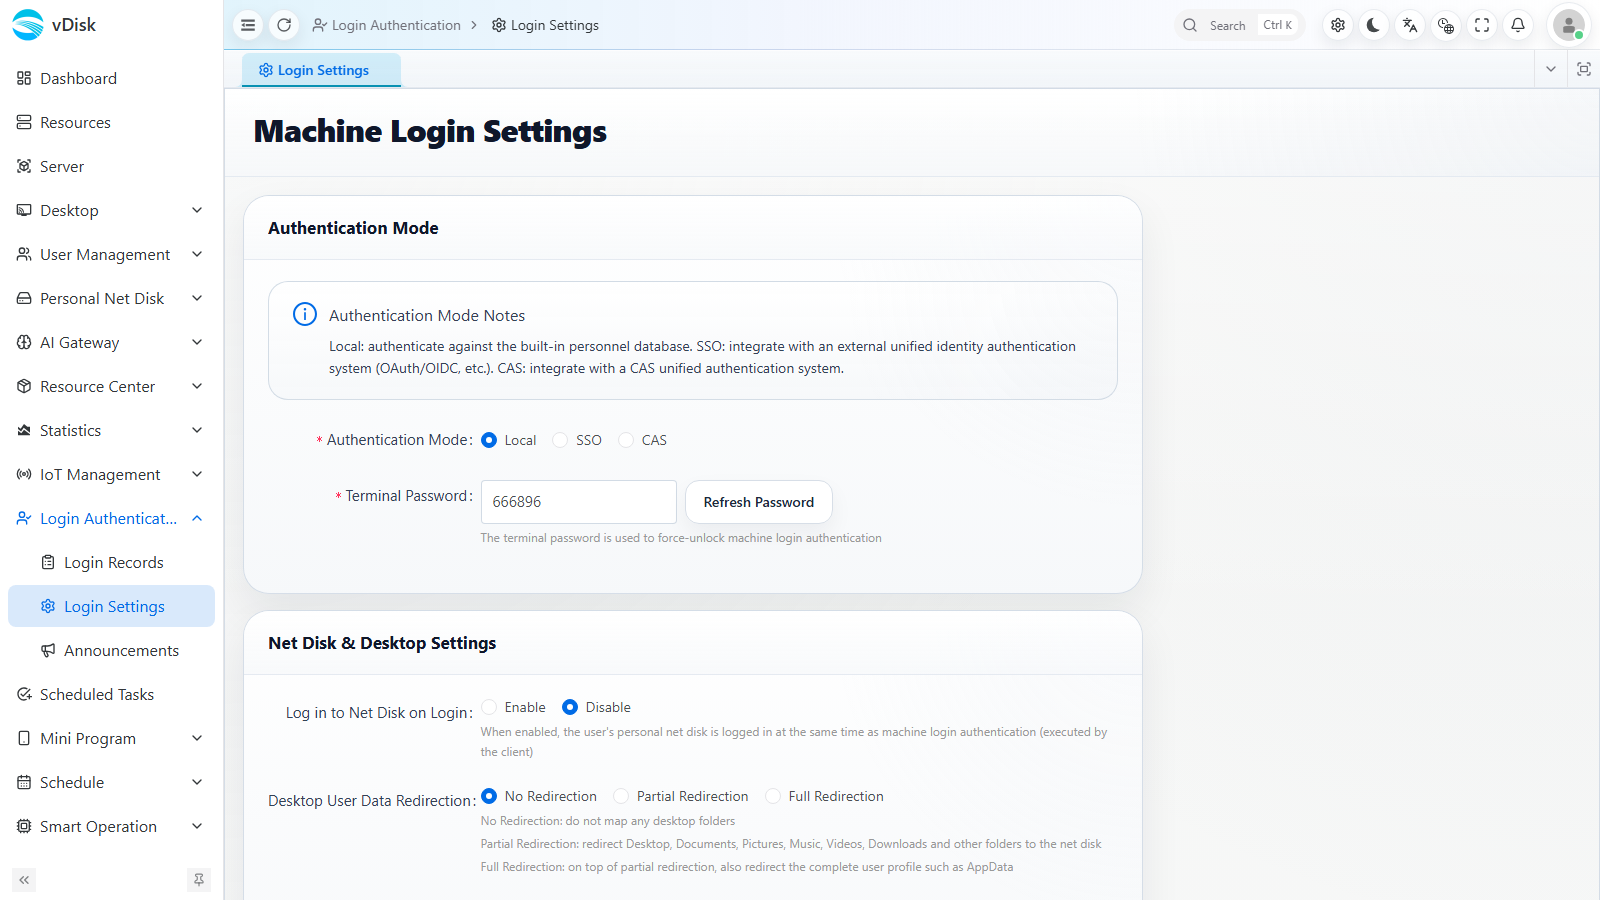
The page mainly contains two parts:
- Authentication Mode: You can select authentication methods such as Local, SSO, CAS, etc. Among these, SSO / CAS are suitable for integrating with external unified identity authentication systems (such as DingTalk) and require the relevant integration configuration.
- Terminal Password: This is the super unlock password. You can click "Refresh Password" to regenerate it; when the authentication screen cannot be passed normally, you can use this password for emergency unlocking and login.
- Net Disk & Desktop Settings: You can set whether to automatically log in to the personal net disk at login (Enable / Disable), and the desktop user data restriction level (No Restriction / Partial Restriction / Full Restriction).
3. Maintaining Authentication Personnel (Personnel Management)
Go to the Login Authentication module's Personnel Management to open the "Personnel Management" page; the left side is the Department / Class tree, and the right side is the personnel list.
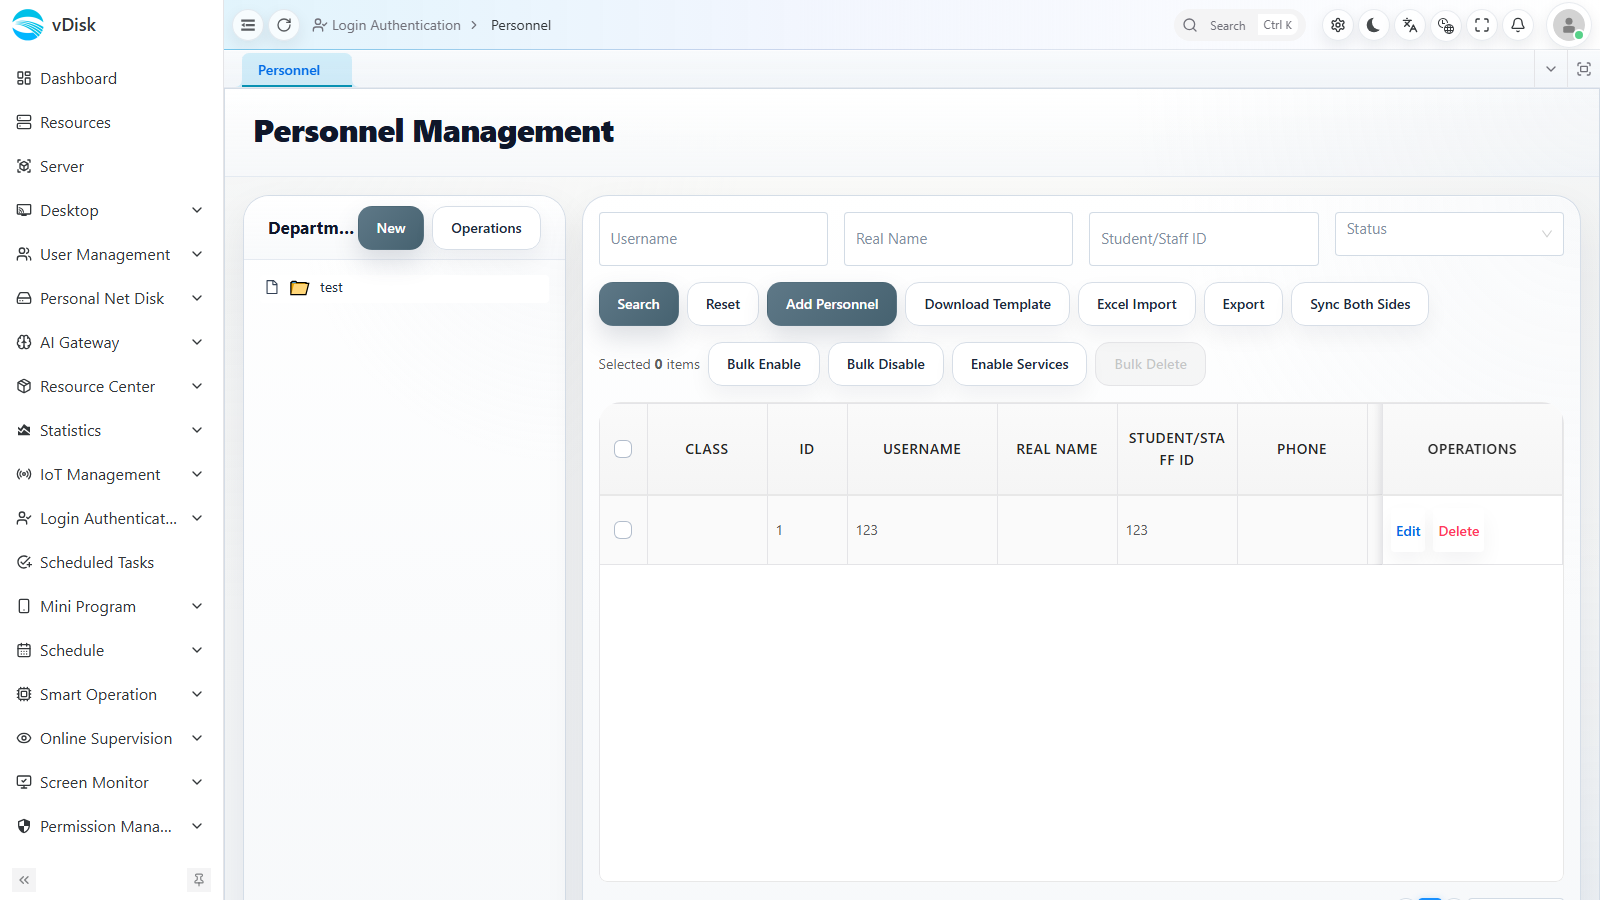
Key points:
First create the class (department), then create personnel.
Personnel can be added manually by clicking "Add Personnel", or bulk-imported via "Download Template" together with "Excel Import"; "Excel Export" and "Sync Both Sides" are also supported.
The list displays fields such as CLASS, ID, USERNAME, REAL NAME, STUDENT/STAFF ID, and PHONE, and supports bulk operations on personnel (Bulk Enable / Bulk Disable / Enable Devices).
4. Login Record Query (Login Records)
Go to Console → Login Authentication → Login Records to open the "Machine Login Records" page and query login activity.
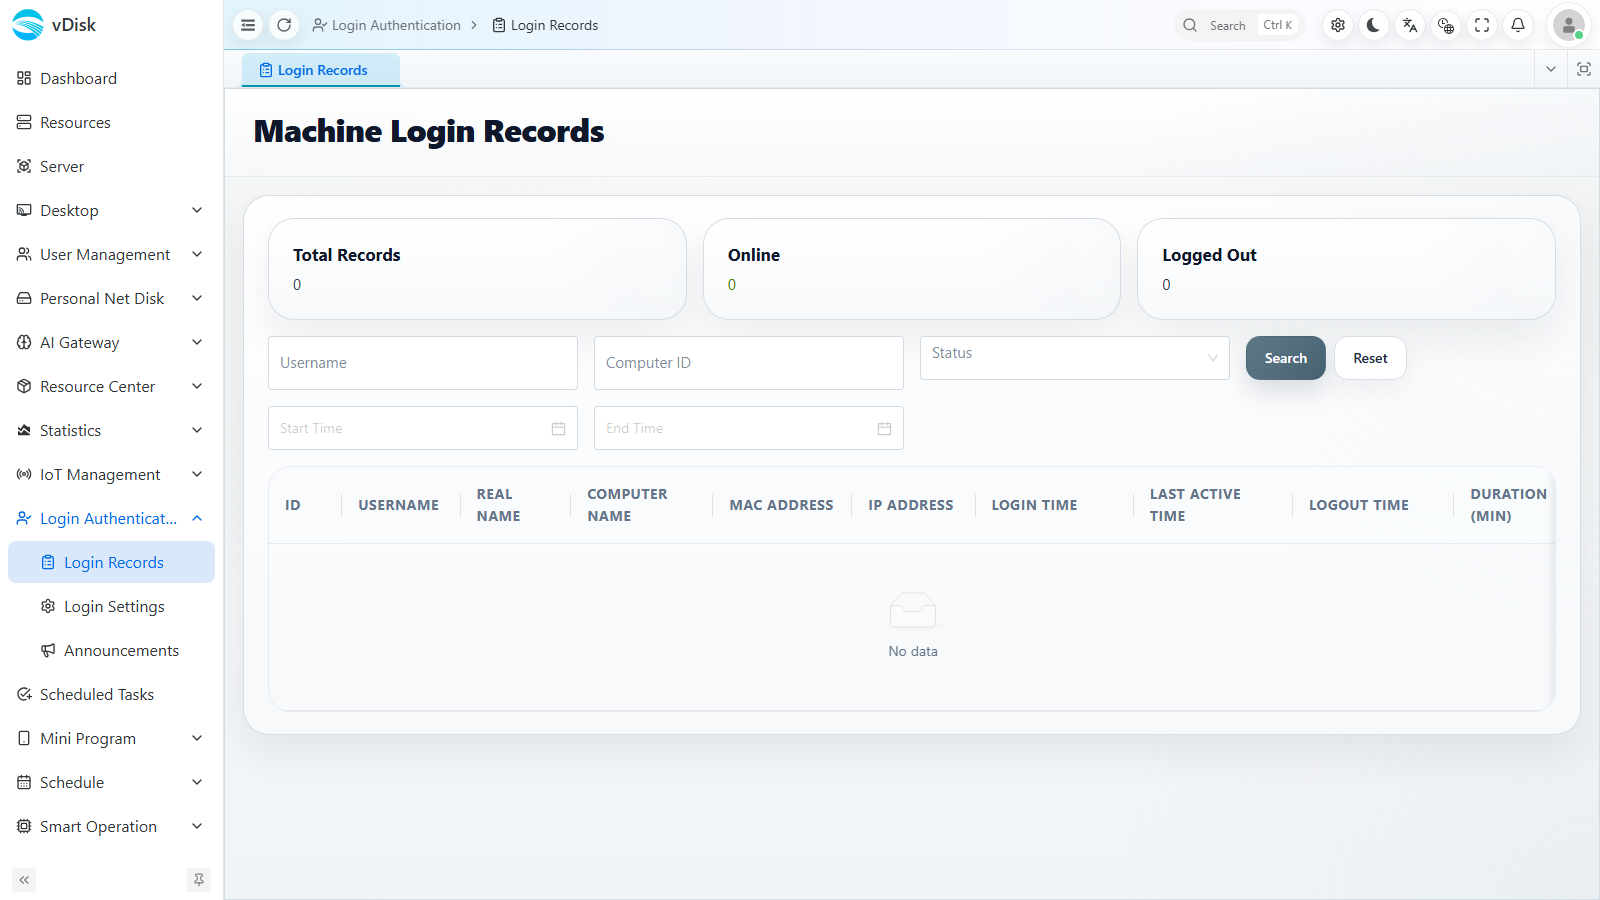
At the top of the page, statistics cards display the number of Total Records, Online, and Logged Out; you can search by Username, Computer ID, Status, and other criteria. The record list includes ID, USERNAME, REAL NAME, COMPUTER NAME, MAC ADDRESS, IP ADDRESS, LOGIN TIME, LAST ACTIVE TIME, LOGOUT TIME, DURATION (MIN), and other information, facilitating real-name auditing and traceability.
5. Login Announcements (Announcements)
Go to Console → Login Authentication → Announcements to open the "Announcement Management" page, where you can push announcement notices on the machine login screen.
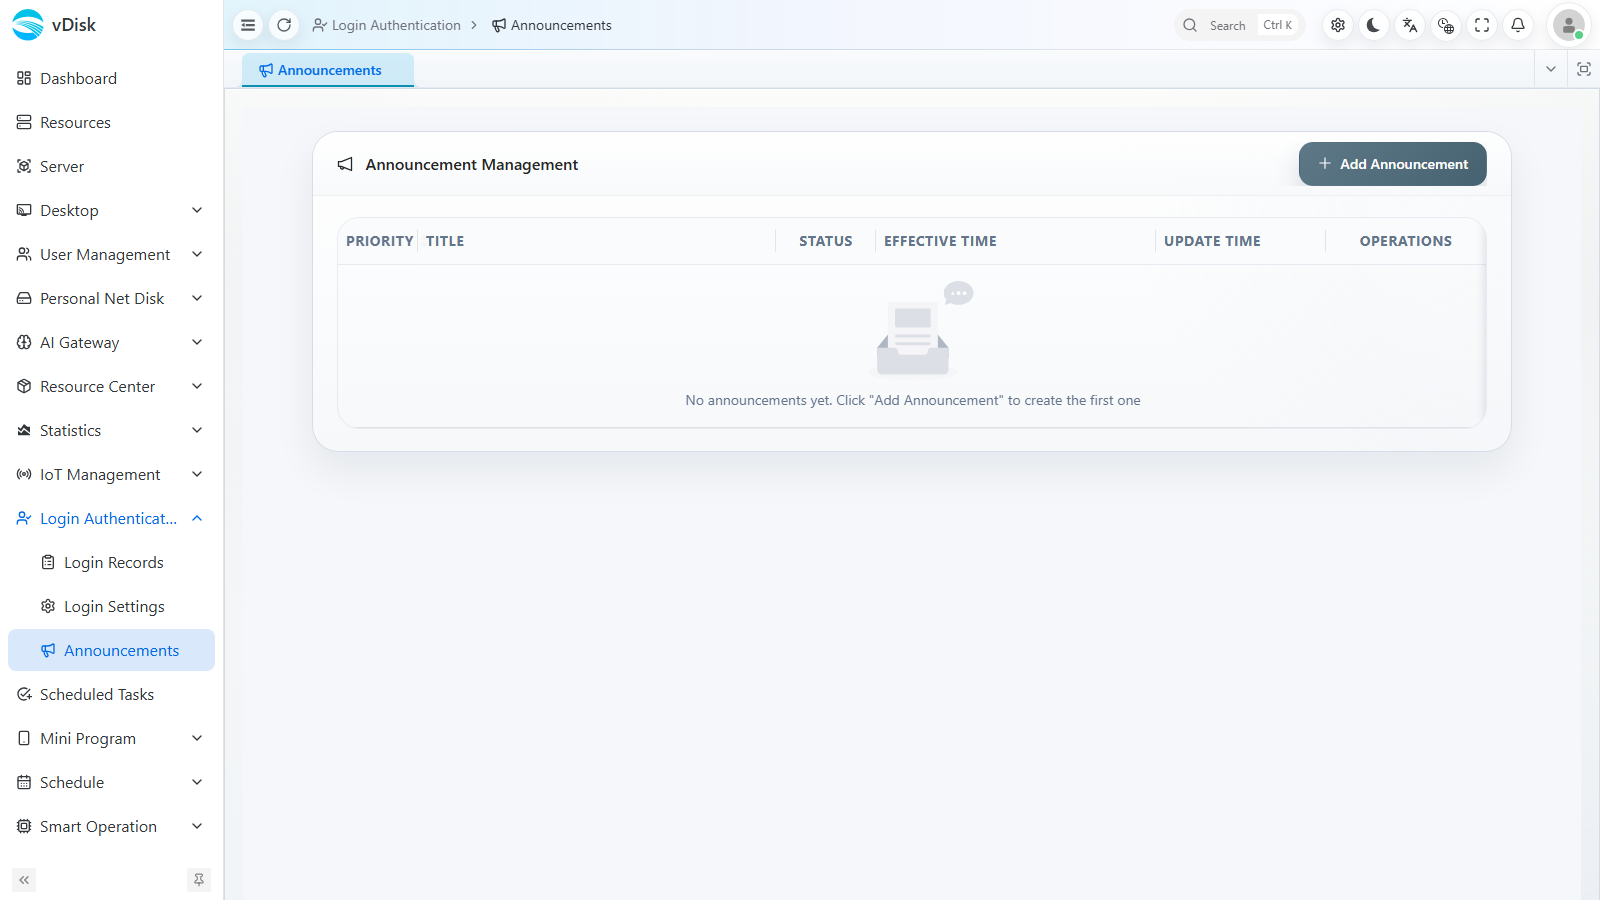
Click "Add Announcement" to create an announcement. The list is managed by fields such as PRIORITY, TITLE, STATUS, EFFECTIVE TIME, and UPDATE TIME, and can display prompt information to users on the login authentication screen.